Table of contents
- Introduction
- Why should I optimize?
- What happens if my site is slow?
- What is WordPress?
- Intro to the WordPress Database
- tl;dr tips for optimization
- Optimization do’s and don’ts
- Hosting
- Hosting Features
- PHP environment
- Own your PHP environment with php.ini
- How to edit files
- Setting PHP limits with wp-config.php
- About .htaccess
- Browser-side caching with .htaccess
- Cache and Minification
- CDN: Content Delivery Network
- Command Line Basics
- Getting started with SSH
- WordPress Command Line
- WordPress Command Line basics
- Update, re-install and un-install with WP Cli
- Verify site health with checksums and scans
- How to recover from hacks – quickie
- Debugging
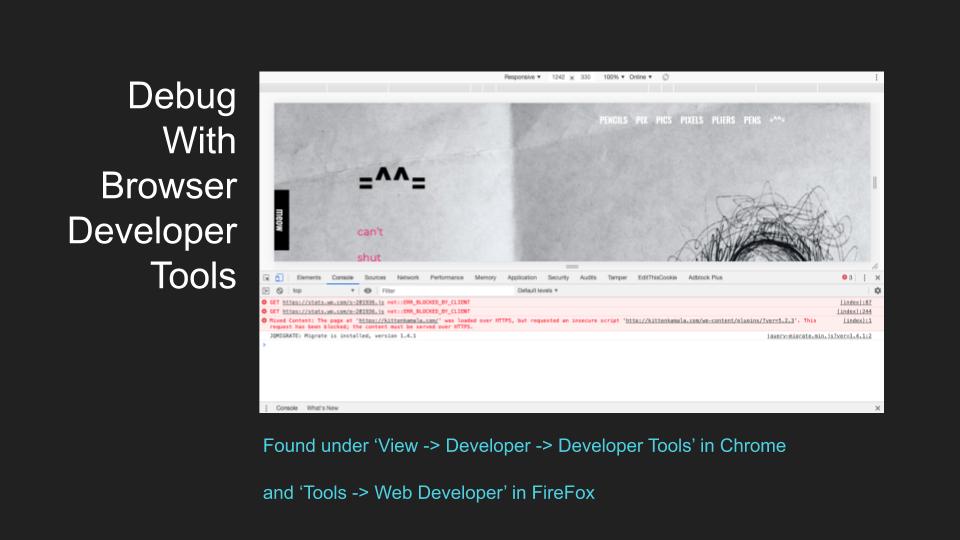
- Browser Developer Tools
- PHP error reporting
- Site Health Module
- WP Profile
- Understanding Errors
- WordPress Error Cheat Sheet
- Database Clean Up and SQL Syntax
- WordPress Command Line for your database
- Connect to SQL with WP Cli
- Basic SQL Syntax
- Use InnoDB
- Database Indexing
- Cleaning up the _options table
- Cleaning up the _posts table
- Cleaning up the _term_relationships table
- Cleaning up the _post_meta table
- Cleaning up the _comments table
- wp db optimize
- Clear persistent object cache
Introduction
Thanks for visiting my wiki! I’m Amy and I’ve been working as a WordPress technician for almost 5 years, helping thousands of users around the globe be more confident and more capable in working with their WordPress websites. I did some math and it turns out that I have fixed over 45,000 website errors for panicked WordPress users.

Working directly with WordPress users has led me to deeply understand the challenges and demands website owners face. So, my team and I developed a series of WordPress Maintenance Packages to help people like you have more performant, more secure and more popular WordPress websites. You can request a WordPress maintenance package (optimization, database clean up, SEO, hack recovery, etc) by hitting my contact page, or if you host with DreamHost (#ad) you can order a maintenance package through their DreamCare developer service.
This article is an extended version of the most popular of those maintenance packages; full site optimization and database clean up. In the spirit of Open Source I am sharing how to do this as part of my “Own Your WordPress” series. One disclaimer though – I wanted to let you know that some of the links here are affiliate links (marked with #ad), and I do earn from qualifying purchases. My intention, though, is to help people have more resources to find and use the right tools that enable them to achieve their website goals with ease.
Yay! Let’s get started.
You may be wondering: Why should I optimize?
Well, the answer to that is: simple. Website visitors don’t want to wait.
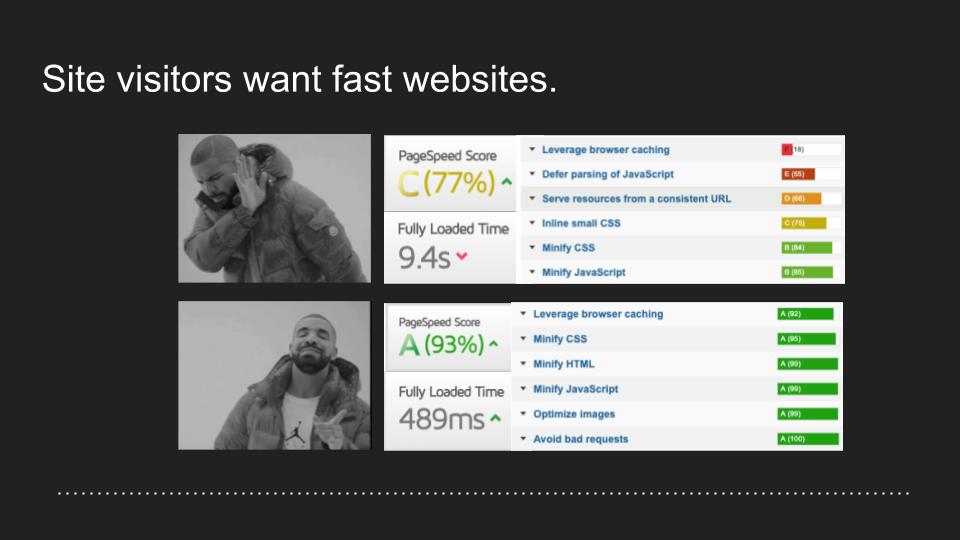
You may be wondering: What happens to my site visitors if my site is slow?
Well, the answer to that is: simple, too. They bounce.

It has been proven time and again that website visitors leave after waiting for an average of 5 seconds, and tend to not come back. Don’t believe me? Maybe HubSpot can convince you. A one second delay can reduce page views by 11%. Google Search algorithms rank sites with more page views higher. A slow site means fewer pages indexed by bots because fewer pages can load during the bot visit. BUT — the goal here is that after following these steps you won’t have that problem!
You may be wondering: What is WordPress?
Ok, probably not, but I’m going to tell you anyway.
WordPress is a full stack web application that uses PHP, Javascript, CSS and HTML as well as an SQL Database. That’s what “full stack” means; it uses the full stack of web technology. WordPress is free and open source; anyone can use it and anyone can modify it. It has point and click capabilities in its administrator dashboard, wp-admin, and allows for extensibility via themes and plugins. That means you can extend and customize the functionality and look of your WordPress site using plugins and themes. Fun!!
A theme determines the way the website looks, and plugins add extra functionality on top of what WordPress core offers. Extensibility is one of the things that makes WordPress great to use. You can install themes and plugins at will, or not at all. It’s up to you. You can also code your own plugins and themes but we won’t get into that here.
Take a look at what WordPress core files look like when listed via command line prompt:

Those are just the PHP files and folders in the root (main folder) of a WordPress install, which is only part of the WordPress install. The other part of WordPress core consists of 12 database tables.
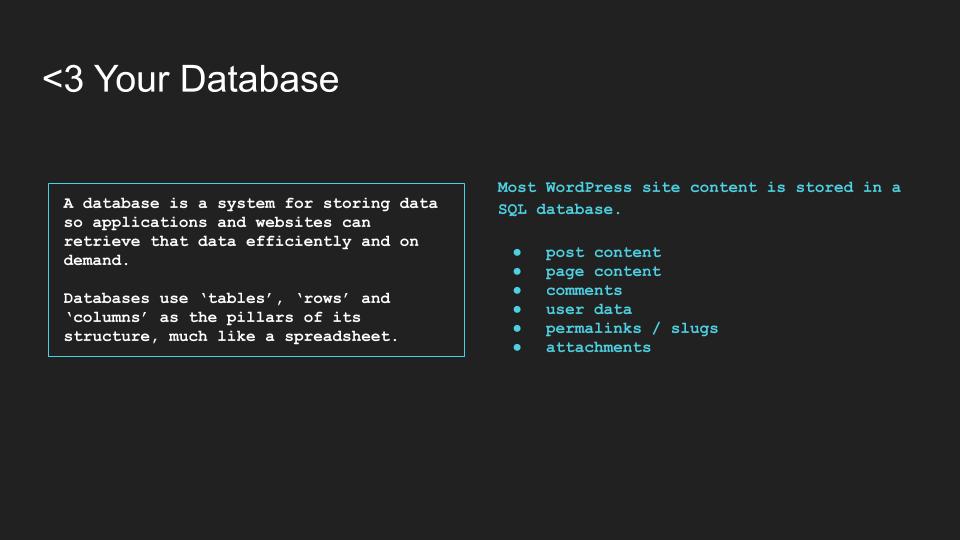
You may be wondering: Did she say just say DATABASE!!??!?!
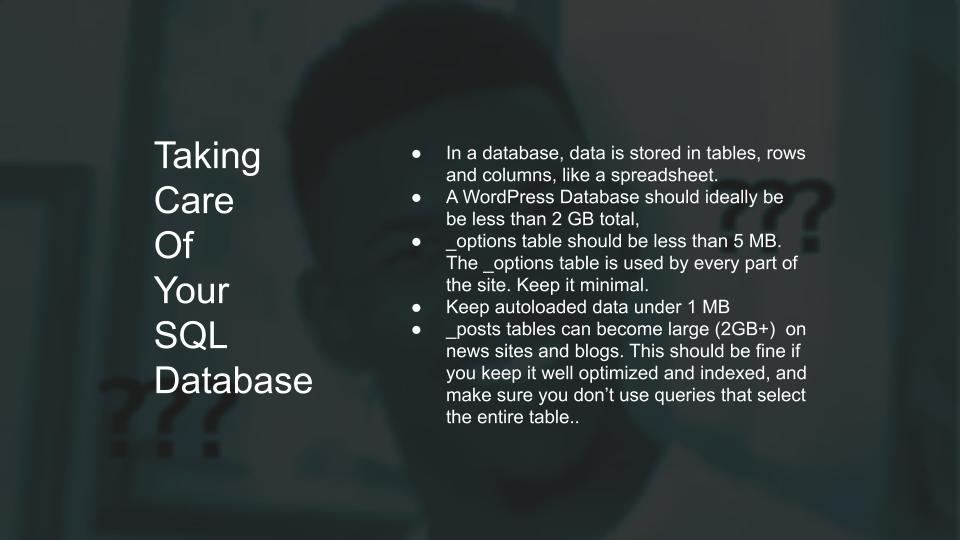
..and the answer is that I sure did! The majority of content in a WordPress website is stored in the SQL database. That includes post content, attachments, user data, links, comments and more. If a database is bloated (full of digital clutter) it will be slow and clunky because it takes longer to search through all that clutter to retrieve data. So it is best to keep your database minimal and healthy and well organized. Ideally a database should be under 2 GB with an options table of less than 5 MB. The database is a fundamental part of a WordPress website so if you’re not familiar, read up and get to know because it’s very important for WordPress health.
Ok, I know some of you are rolling your eyes because you already know this stuff. Hmm yes, the floor here is made of floor.

…and you may be wondering: Is she going to actually teach me anything?
Well, the answer to that is:
maybe.
What I can promise, though, is that this will get more and more technical and challenging as we move further along. BUT if you’re bored already and just want some quick tips, you can find that right here, right now, no questions asked.
Here is a tl;dr for WordPress optimization:
For those who want to keep reading, let’s talk about this more.
Optimization DOs and DON’Ts.
DON’T:
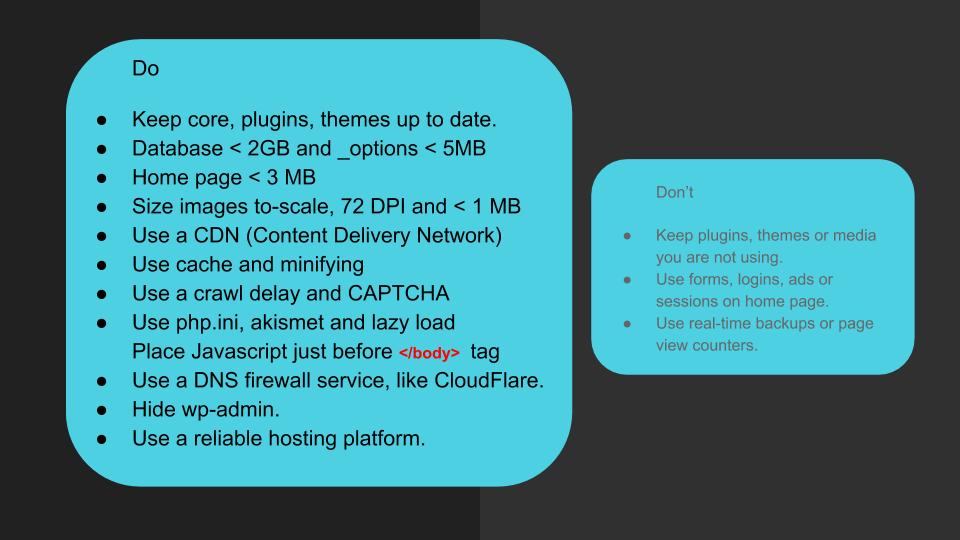
- Keep data you’re not using. That includes themes, plugins, media and database data.
- Use unique user sessions on the home page if you use cache. Unique user sessions can’t be cached properly and effectively break cache, oh – and kill performance. Things that use sessions are anything that serves data applicable to only one user; contact forms, my-account pages and the like. The home page is specified here because the home URL is the URL that the other links revolve around, so you don’t want that page to be broken.
- Run real time backups and individual page view counters, because those tend to run non-stop forcing your site and server to take on extra demand, and if you have a busy site that can seriously tax the server much like a mini DDOS. Then you’ll be like:

DO:
- Make sure to always keep your WordPress core, plugins and themes up to date with the most recent version. This is for both security and performance.
- Keep your database and home page as small as possible. The home page should be under 3 MB ideally and load as few resources as possible. Minification can help with that second bit.
- Optimize your images for the web at 72 DPI and the size they will be displayed. You don’t want your website working overtime sizing images up and down as they’re served. You can use Photoshop or a plugin for image optimization.
- Make sure to also use cache and minification. We’ll get into that in more detail in a bit.
- Do use the variety of tools available to regulate both good and bad bots like a robots.txt file.
- Use CAPTCHA while you’re at it to help minimize bot traffic (can be implemented with a plugin as well).
- Use akismet or something similar to keep spam comments at bay.
- Use lazy load features to have images load as they are viewed instead of all at once when the page is first called.
- Do use a firewall service and hide your wp-admin under an alternate URL, which you can do using an .htaccess file or a plugin.
- … and lastly do choose a reliable hosting platform.
Phew. I know this is a lot of info already! Don’t worry though, because there is more!

Ok, Hosting. Here we go.
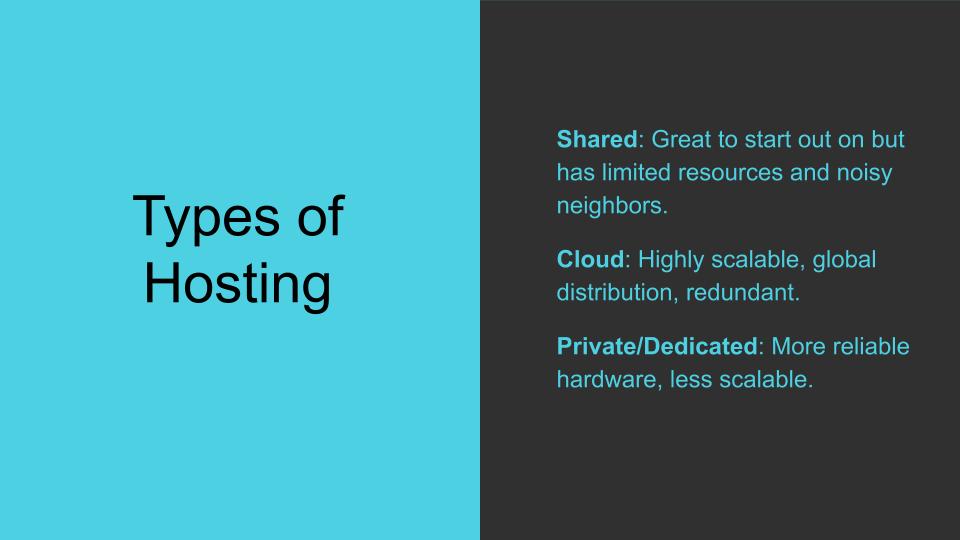
Shared is great for starting out, but tends to have low caps on server resources, and your site can be negatively affected by activity on other websites hosted on the same server.
Cloud is great because it’s highly scalable. Cloud technology uses containerization which can be resized at will.. which means you can grow your site with ease. Cloud hosts like AWS and Google also provide a distributed system with data centers across the globe, and redundancy, so that enables data to be served more quickly to visitors near by. If there is more than one copy in more than one place (redundancy) your data will be more available and less likely to become damaged beyond repair. If it’s geographically closer it takes less time to travel.
Private/Dedicated servers are more reliable in terms of hardware, however can not be distributed across datacenters, don’t offer redundancy options, and can only be scaled up by adding new hardware. Which means your site will go down during the upgrade.
So Cloud is really the best option. Guess what though!? Some hosts, like GreenGeeks (#ad), are now offering Shared Hosting using a Cloud infrastructure which gives you ALL the benefits of Cloud for the cost of shared. Woah there! Changing the face of hosting!
Let’s talk hosting features.
I recommend going for a managed hosting platform so someone else (a professional System Admin) handles server maintenance and upgrades for you. You kind of can’t really beat that, it saves you a ton of work.
You’ll also want to make sure the software the host is using is current. WordPress requires a LAMP/LEMP environment. That means it has to run on a Linux operating system with Apache or Nginx, MySQL or Maria DB and PHP installed. Ubuntu Trusty (14.04) is my bare minimum for Linux version and that one is even outdated. If you’re just signing up for a brand new hosting platform go for Ubuntu 16.04.6 (Xenial Xerus) or higher. Ubuntu is an open source software, too, so it’s my personal favorite. Mint, Debian and OpenSUSE are also good distributions.
If you go for a hosting platform that doesn’t offer global redundancy across data centers (aka, not Cloud), you’ll want to make sure your server location and the location of your SQL database (which is sometimes on a separate server) are close to each other and to your visitors geographically. Data travels fast but it still takes longer to go further distances just like everything else.
Last but not least, you’ll want to pay attention to whether your hosting platform has server-side cache or not.
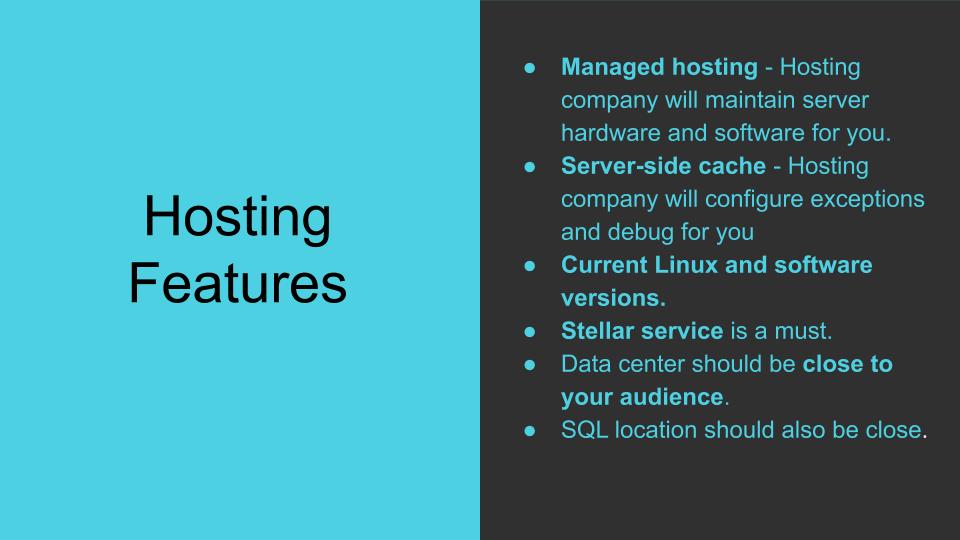
We’re going to get into cache in more detail in a minute, but I just wanted to throw in that if you have server-side cache, your host will be able to debug and create cache exceptions for you.
That being said – make sure you get a host with amazing customer service because you’ll be going to them when you’re stressed and need help.
PHP Environment
You’ll also want to make sure your host offers the most recent versions of PHP as well as HTTP/2. PHP 7.0 and below have been EOL’d, which means that they are no longer supported by the developers of PHP. PHP 7.3 is the fastest version, so go for that if you have the option.
HTTP/2 is also a faster and more secure protocol. You can use a free Let’s Encrypt certificate and they do the same thing as a the basic Comodo or other professionally signed certificate. If you don’t use SSL and HTTP/2 you’ll get flagged as insecure by browsers and in search engines. d’oh!
Own your PHP environment with a php.ini
Once you’re good to go with a host, you’ll want to configure your php environment as well, to maintain control over PHP resources. You can do this using what is called a php.ini file.
Please note that different hosts may use alternate versions of this file. For instance, DreamHost uses a phprc or a .user.ini in place of a php.ini. php.ini is the standard naming convention, however.
With a php.ini file you can set limits on memory usage, execution time and more, like so:
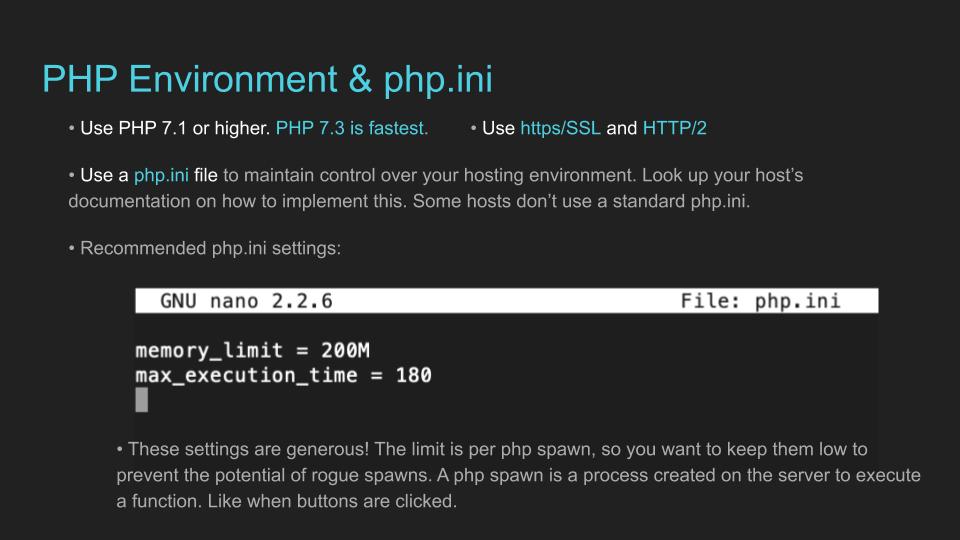
Here is a copy/paste version with a few extra values:
upload_max_filesize = 100M
post_max_size = 105M
memory_limit = 200M
max_execution_time = 180
Please note that 200M is actually high for a memory limit. That limit is per PHP spawn. So, basically for every page click, that process is allowed to use up to 200M. If you have a busy site that can add up quickly and you may want to use a cap on memory of 128M instead.
How to Edit Files.
Since we’re talking about editing files now, let’s pause for a second to look at how we can go about doing said editing. There are a few different options for this, such as S/FTP, wp-admin and PHPmyadmin. cPanel is great because it offers all 3 of those interfaces rolled into one. PHPmyadmin and MySQL WorkBench are both graphical interfaces for database management, while S/FTP and cPanel are graphical interfaces for editing the front-end website files. cPanel also offers an internal link to PHPmyadmin.
There is also SSH, which is a direct, secure server connection using a command line interface.

For the bulk of this article we’ll be working with command line. This is partially because I really love command line, but mostly this is because command line is a more efficient and more effective tool. Cli uses cURL rather than http requests to start, so it doesn’t create as much front-end activity. If your site is slow on the front end. Command line is likely to be a lot faster than wp-admin and s/ftp, too, and you’ll be grateful for that. Command line also offers output with debugging information that can lead you to the source of an issue. Command line is also the gateway from noob status to knowledgeable status, which may very well be my next article/talk. The bottom line is: If you want to Own Your WordPress (or any website for that matter) you need to get comfortable with command line.
We’ll get into command line more in a minute, as well, but just know that if command line is slow to run, ask your host to take a look to see whats going on server-side. That could be from a full disk, maxed out CPU/RAM or a DDOS. If the slowness is just in-browser, though, you can handle that on your own. Command line can do everything and more that wp-admin AND PHPMyAdmin does.
Setting PHP limits with wp-config.php
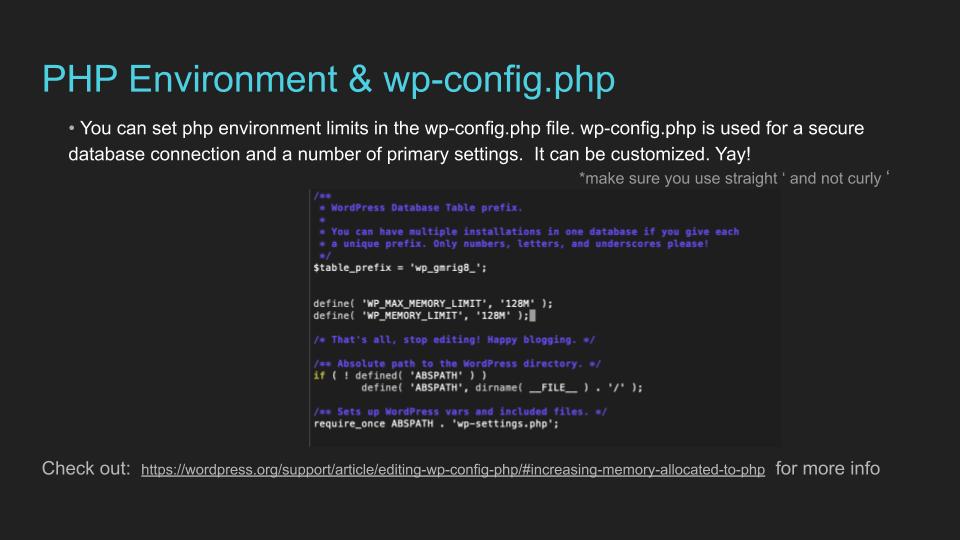
Ok, back to our PHP environments. You can also set PHP limits in your wp-config.php file, which is a vital part of WordPress Core as it houses the database connection credentials and security salts. Luckily for us it can be customized to affect site behavior. If you ever get a `Allowed memory size of bytes exhausted` error, which you inevitably will at some point working with WordPress, you can usually remedy the error by increasing PHP memory in your wp-config.php file. With no customizations here the PHP memory default is 40 MB. Not very much.
Feel free to copy/paste this into your wp-config.php file:
define( 'WP_MAX_MEMORY_LIMIT', '128M' ); define( 'WP_MEMORY_LIMIT', '128M' );
You can use both php.ini and wp-config with memory values, but make sure the value is the same in both files. If you use 200M in php.ini, use 200M in wp-config and vise verse.
Here is more information on this from WordPress.Org
Now we’re starting to dig in more. Let’s take a look at another vital file:
.htaccess:
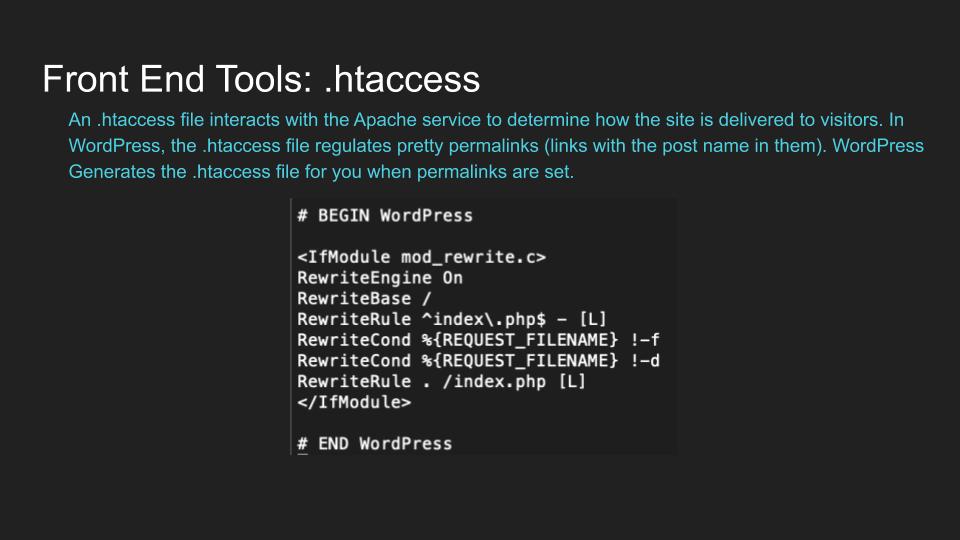
The .htaccess file is a vital file for a WordPress install if you use pretty permalinks (which means the link contains the name of the post). .htaccess communicates information about the site to the Apache service, which is responsible for serving site data to your visitors. This file is really important and can often be a source of error or site downtime. Above you see the default code, but customizations can be added to this file as well. Please note that if you are trying to edit .htaccess using ftp, you may need to enable hidden files in your ftp client settings, since the file starts with a dot.
Browser-side cache with .htaccess
You can add browser-side caching via .htaccess by inserting some code into the .htaccess file. GTMetrix usually likes this.
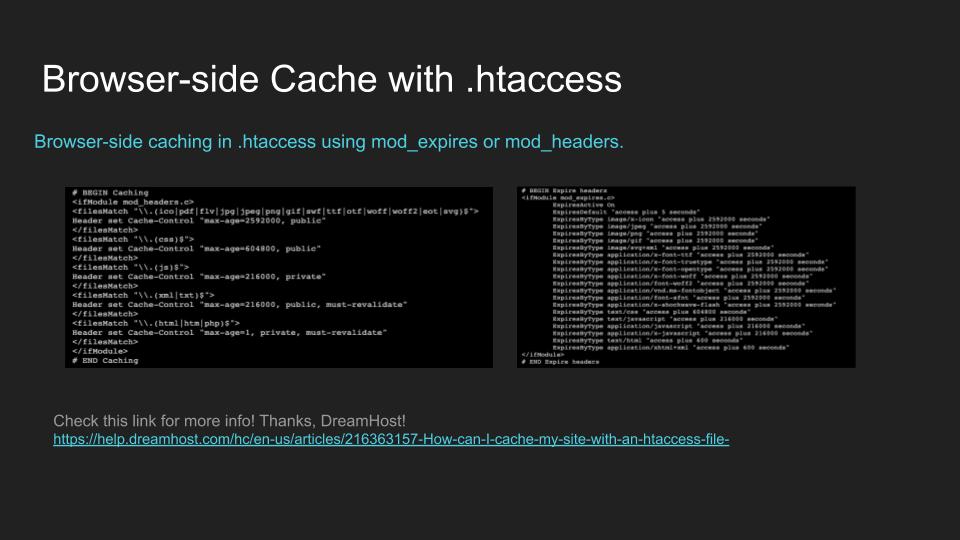
feel free to copy/paste these mod_expires and mod_headers directives into your .htaccess file:
# BEGIN Expire headers
<ifModule mod_expires.c>
        ExpiresActive On
        ExpiresDefault "access plus 5 seconds"
        ExpiresByType image/x-icon "access plus 2592000 seconds"
        ExpiresByType image/jpeg "access plus 2592000 seconds"
        ExpiresByType image/png "access plus 2592000 seconds"
        ExpiresByType image/gif "access plus 2592000 seconds"
        ExpiresByType image/svg+xml "access plus 2592000 seconds"
        ExpiresByType application/x-font-ttf "access plus 2592000 seconds"
        ExpiresByType application/x-font-truetype "access plus 2592000 seconds"
        ExpiresByType application/x-font-opentype "access plus 2592000 seconds"
        ExpiresByType application/x-font-woff "access plus 2592000 seconds"
        ExpiresByType application/font-woff2 "access plus 2592000 seconds"
        ExpiresByType application/vnd.ms-fontobject "access plus 2592000 seconds"
        ExpiresByType application/font-sfnt "access plus 2592000 seconds"
        ExpiresByType application/x-shockwave-flash "access plus 2592000 seconds"
        ExpiresByType text/css "access plus 604800 seconds"
        ExpiresByType text/javascript "access plus 216000 seconds"
        ExpiresByType application/javascript "access plus 216000 seconds"
        ExpiresByType application/x-javascript "access plus 216000 seconds"
        ExpiresByType text/html "access plus 600 seconds"
        ExpiresByType application/xhtml+xml "access plus 600 seconds"
</ifModule>
# END Expire headers

# BEGIN Caching <ifModule mod_headers.c> <filesMatch "\\.(ico|pdf|flv|jpg|jpeg|png|gif|swf|ttf|otf|woff|woff2|eot|svg)$"> Header set Cache-Control "max-age=2592000, public" </filesMatch> <filesMatch "\\.(css)$"> Header set Cache-Control "max-age=604800, public" </filesMatch> <filesMatch "\\.(js)$"> Header set Cache-Control "max-age=216000, private" </filesMatch> <filesMatch "\\.(xml|txt)$"> Header set Cache-Control "max-age=216000, public, must-revalidate" </filesMatch> <filesMatch "\\.(html|htm|php)$"> Header set Cache-Control "max-age=1, private, must-revalidate" </filesMatch> </ifModule> # END Caching
Full disclosure, I copied that code from DreamHost’s Knowledge Base. Thanks, DreamHost (#ad)!
Moving on. Let’s talk more about cache and minifying and then we’ll get into the more advanced stuff.
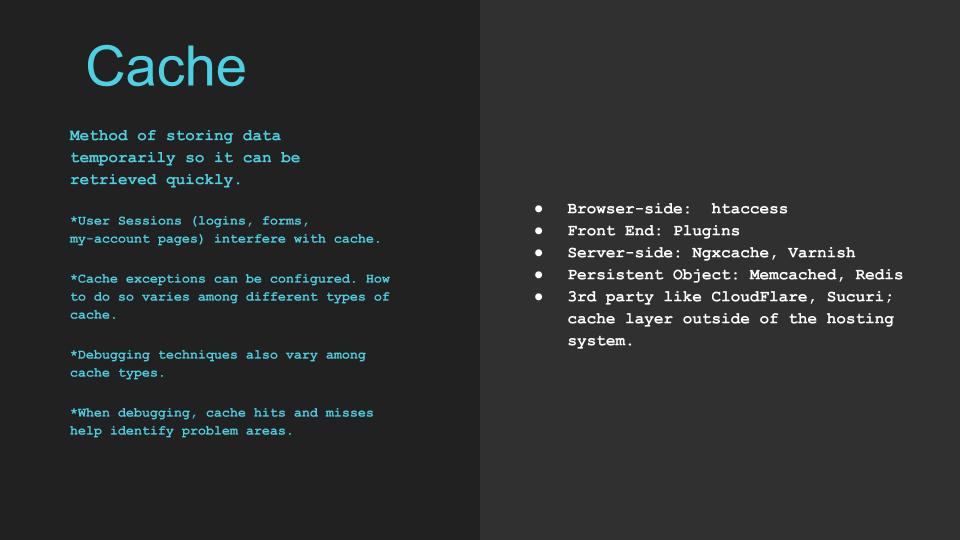
Cache and Minification.
Cache is a method of storing data temporarily, either in memory or in disk, so the data can be retrieved quickly. There are multiple different kinds of cache that can be set up and used either on the front end, server-side or using a service like CloudFlare. Unique user sessions break cache which can hurt performance and cause errors. If you use logins, account pages, forms and the like you’ll want to have cache exceptions set up in your configuration. How to do this varies from cache to cache, and so do debugging techniques. When you debug cache you want to use cache misses to help pinpoint problem areas.
Luckily, setting up cache and minification has been made easy by plugin developers.
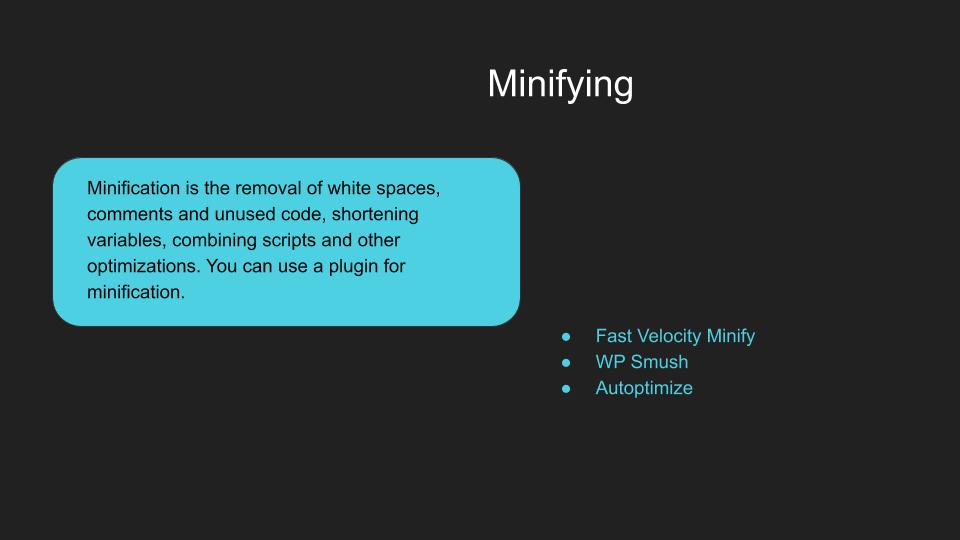
Minifying is the process of removing the unnecessary parts of code (like white spaces and comments) as well as combining different types of code into one long string.
Minifying manually usually ends up in editing and re-writing a ton of code. However if you insist on doing things manually either for fun or for thorough-ness (or because you’re mad), Google developer resources can help with that. Otherwise it’s way, way, way easier to simply use a plugin. Someone already did the work for us. Sweet! ^__^
I recommend Fast Velocity Minify for minifying and cache because it has been proven to boost website performance and page speed scores in a real and noticeable way. This article goes into that in a little more depth. WP SmushIt is another good one. There are quite a few out there.
You may want to ask your host if there are any that are more compatible with your server configuration, and any that are not recommended. If you have server-side cache, you don’t need to add any extra cache layers, but you will still want to minify.
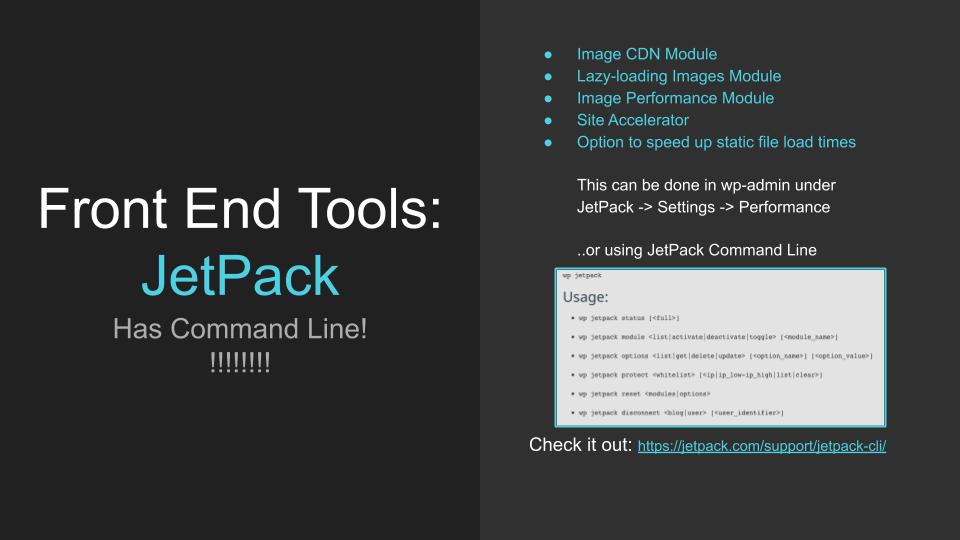
JetPack (#ad) has some fabulous tools for optimizing, including image optimization features like Lazy-loading Images, Site Accelerator and the Image CDN module.
About CDNs
CDN is an acronym for Content Delivery Network.
A CDN is used to deliver media from a third party server (securely) so it can be retrieved faster and with more efficiency without placing extra demand on the web server. Good stuff, that.
CloudFlare also offers an incredible CDN as well as cache, firewall, DDOS protection and more. Did I mention that both JetPack and CloudFlare offer free plans, too? A++, highly recommend.
Back to JetPack, though, The really awesome thing about JetPack is that it has it’s own command line.
Discovering JetPack Cli was kid in a candy shop status for me. I just really love command line. I know it can be a bit intimidating because it’s not visual, which for a lot of people makes it feel super foreign, but don’t worry because you will get used to it and even learn to love it. Ssshhhh…..
Command Line Basics
Here are a few basic commands to get started with:
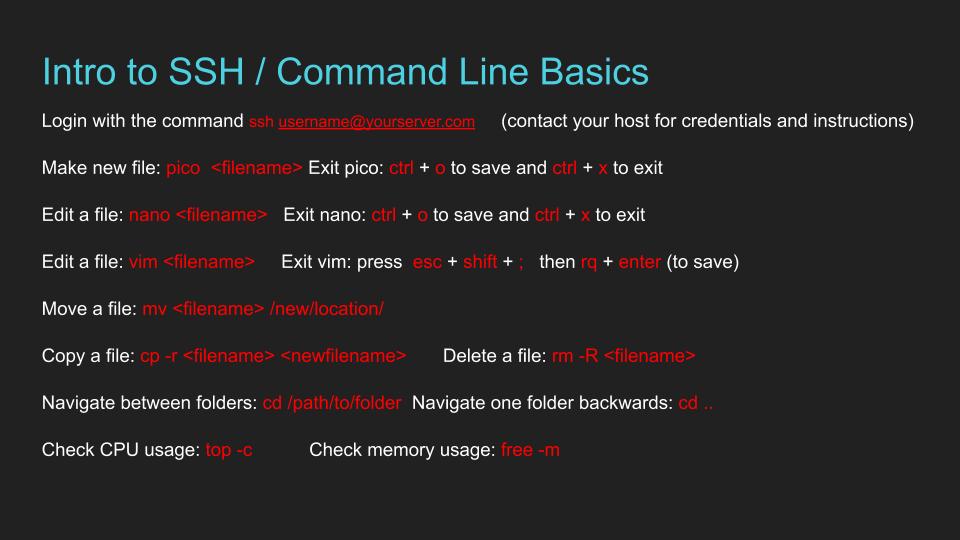
top -cfree -mtop -cfree -m
Getting Started with SSH
You may be wondering: err .. SSH what now?
Well the answer to that is: slightly less simple but that’s okay. let’s do this in a few steps.
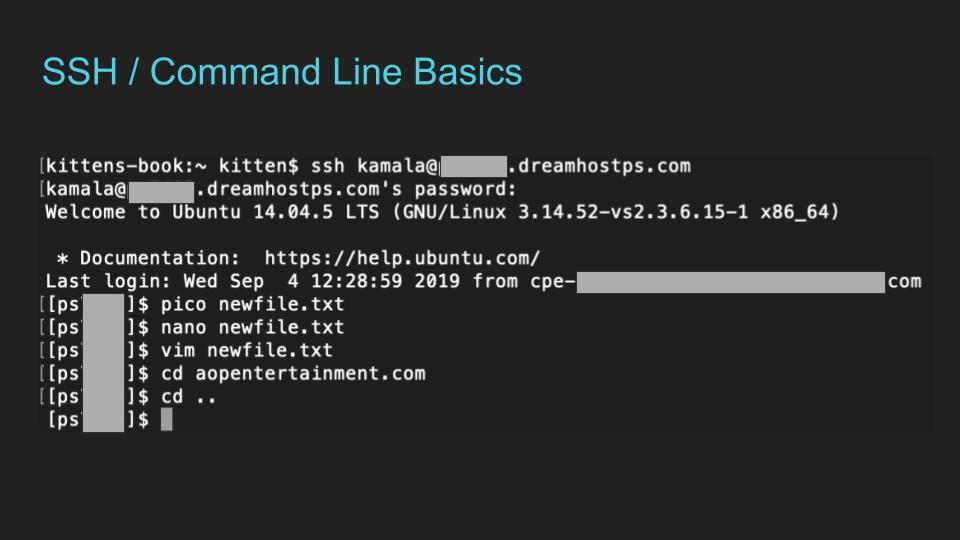
First install and open a terminal client like Putty or Terminal. Terminal actually comes with Apple operating systems, so no need to install anything if you’re a Mac user. (Not for basic SSH, at least.)
You will want to ask your host for guidance on how to connect to your server and what credentials to use (it can vary from host to host), but usually you can connect with a ssh [email protected]
Good news, everyone! WordPress Core has it’s own Command Line, too!
WordPress Command Line
WordPress Command Line (or WP-Cli) is an incredibly useful and a great tool for working with a WordPress install. Most hosts have this installed but if they don’t you may want to look for another host. As I mentioned earlier, for optimal performance the first step is to make sure that your WordPress core, themes and plugins are all up to date. You can check on version status using your wp-admin dashboard orrrr better yet, using WordPress command line.
Here are a few WP-Cli basics.
Find out what core version you’re running with wp core version
List plugin name, version and status with wp plugin listwp plugin status
List theme name, version and status with wp theme listwp theme status
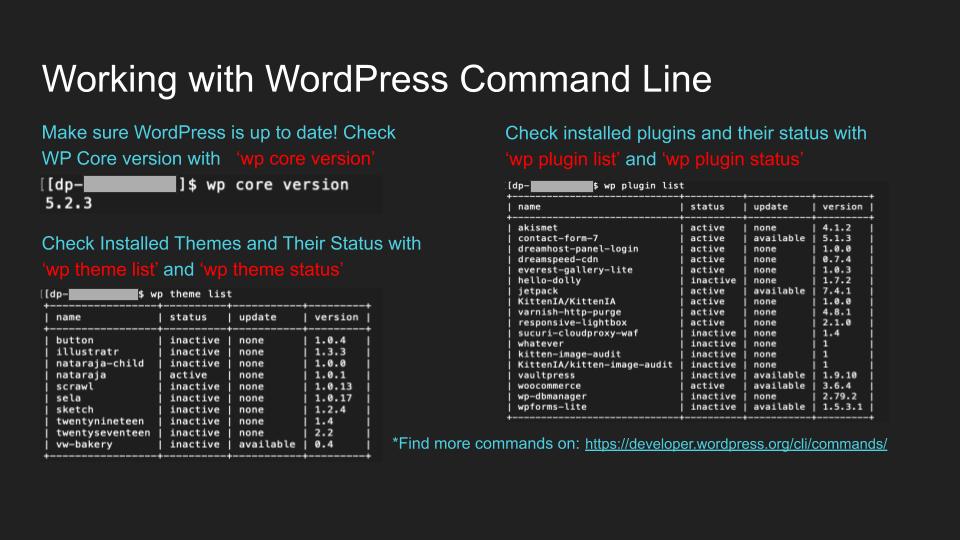
Find more commands on developer.wordpress.org
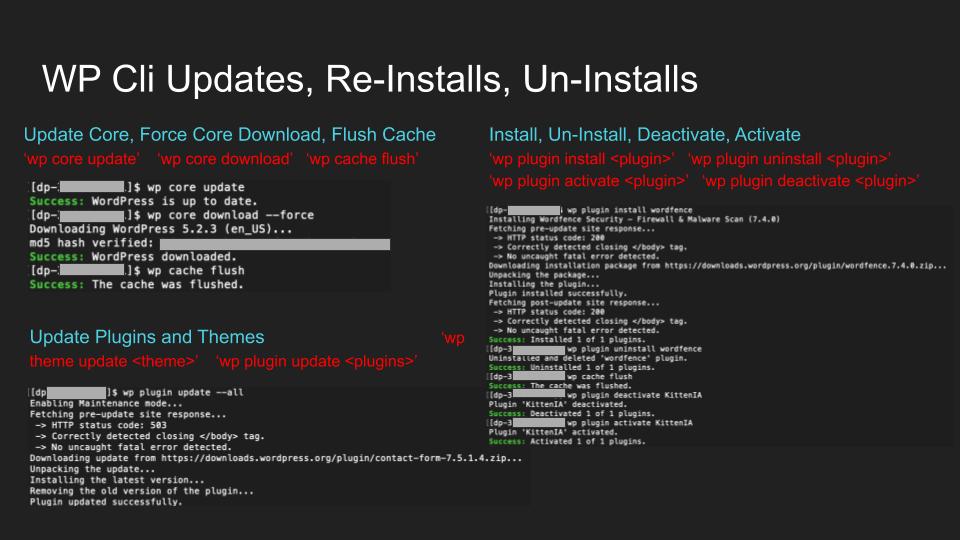
Update, reinstall, and uninstall with WP Cli
You can also use WordPress command line to update, reinstall and uninstall WordPress core, themes and plugins.
Update WordPress core with wp core update
Reinstall WordPress core with wp core download --force
Activate and deactivate themes and plugins with a wp theme activate <theme>wp plugin deactivate <plugin>
Install themes and plugins with a wp theme install <theme>wp install plugin <plugin>
Uninstall themes and plugins as well with wp theme uninstall <theme>wp plugin uninstall <plugin>
Update themes and plugins with wp theme update <theme>wp plugin update <plugin>
By the way, I’m really sorry that some of these images are just plain ugly. I made something like 69 slides (nice) so .. that’s a lot of work already and I haven’t had the chance to go through and make every image well designed. I might not ever go back and do dat, or maybe I will, but in the meantime these have the info you need. So bare with me for a few while we get through this raw, rather un-fluffy technical stuff.
Verify WordPress core health with checksums and scans
WordPress Command line can be used to run checksums verifications which checks for corruption, missing files and hacks.
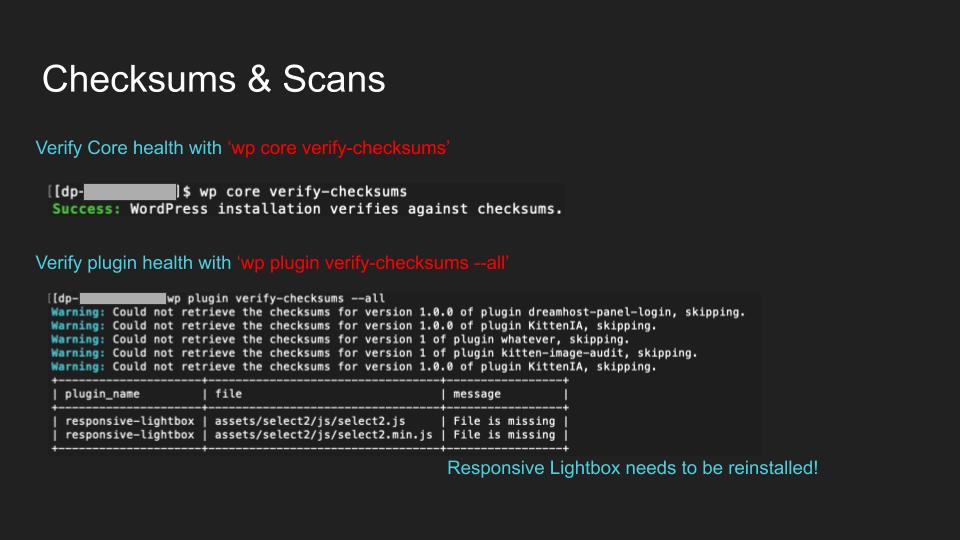
Verify WordPress core Health with wp core verify-checksums
This is what it looks like when core can not be verified against checksums.
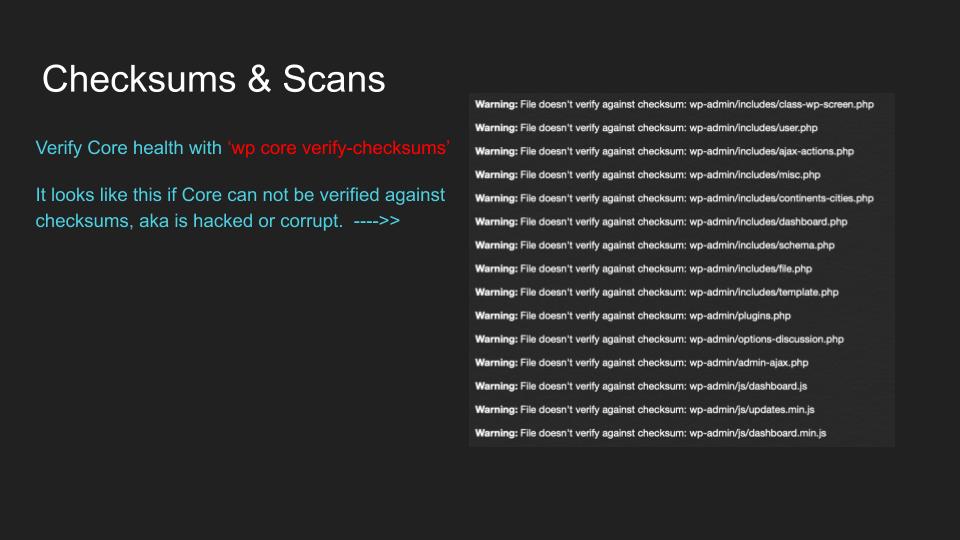
This is when you would want to use a wp core download --force
Verify plugin health with wp plugin verify-checksums --all
Here is what it looks like when WordPress core is perfectly happy, and then when a plugin can not be verified against checksums. From there, you’d want to go ahead and re-install the plugin.
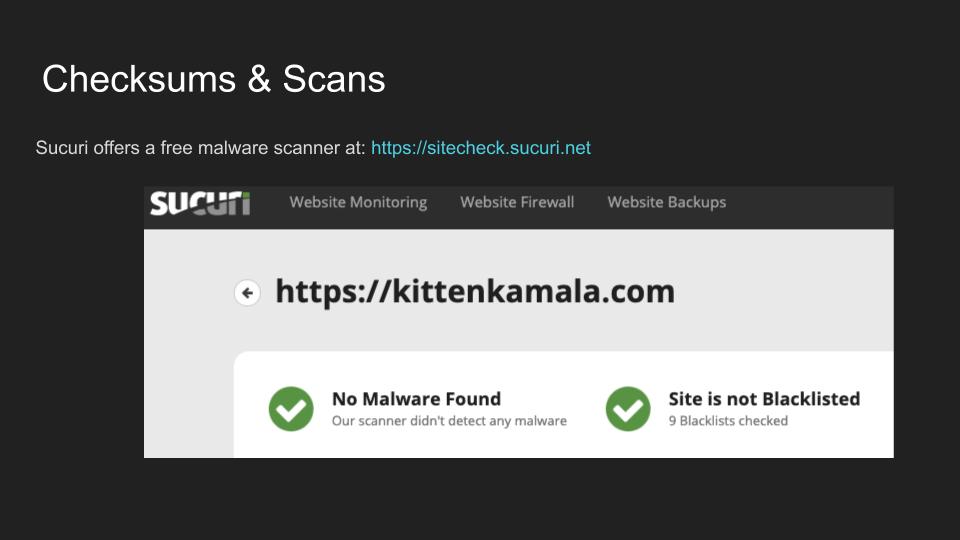
You can also use external tools to run security scans. In the case of a hack, it’s best to be thorough. Most hosts provide options for security scans, but you may want to run your site through Sucuri’s free security checker which can sometimes pick up on things that other scans don’t. It looks like this if your site is clean:
How To Recover From Hacks – Quickie
If your site does happen to be hacked, you can fix it yourself if you want! Start by resetting all your passwords including user passwords. Export the database, rename the folder the site lives in and create a new one. Re-install core and update your wp-config with your new database credentials and new salts. Reinstall plugins and themes. Copy over your wp-content/uploads folder if the files are clean. Cleaning up the database is kind of complicated but you can do so using SED

You may be wondering: Why is she trying to make this sound easy?
Ok lets be real here – It’s not easy. Recovering from a hack is its own 69 slide lecture, and will be a “Own Your WordPress” article/talk in the near future. This is just an intro. If you want to hire a professional to handle this for you, get at me. Or your host may offer recovery services, for example DreamHost’s (#ad) Hacked Site Repair service.
The bottom line is, though, your site will not be performant if it’s hacked. So get it checked and get it fixed.
Debugging and Diagnostics
Alright, you may be wondering: what if it’s not hacked? How do you find out why it’s slow or broken?
Excellent question, friend. You can diagnose the source(s) of an issue (like site slowness) through debugging and diagnostics. Woo!

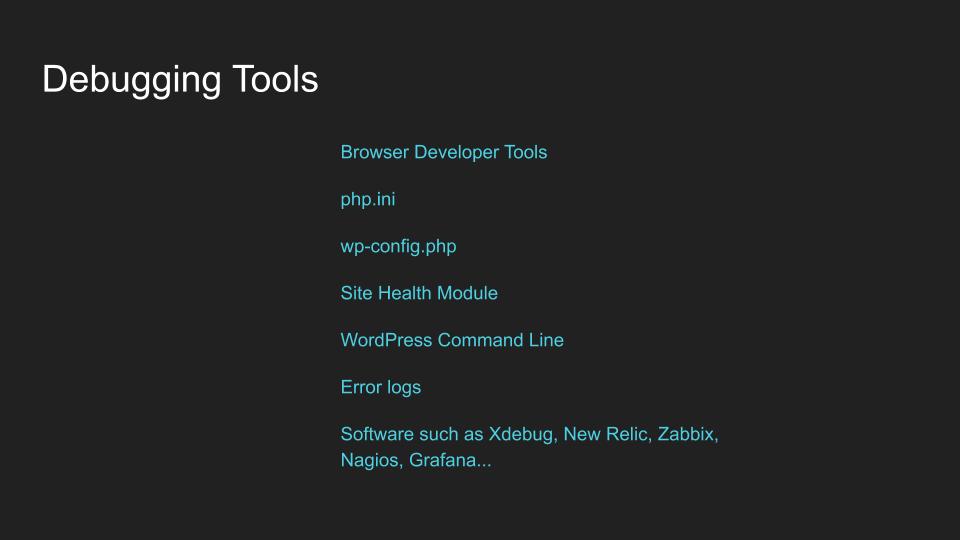
Luckily there are a plethora of debugging and diagnostic tools available. Browser developer tools, php debugging through php.ini and wp-config.php, the site health module, command line, error logs and monitoring softwares like xdebug and New Relic, to name some..
Browser Developer Tools
Below is what browser developer tools look like. With browser developer tools you can check headers, view cookies, locate errors, and even input javascript into the console. Very useful. Once again, Google comes to the rescue by giving us the low down on browser dev tools.
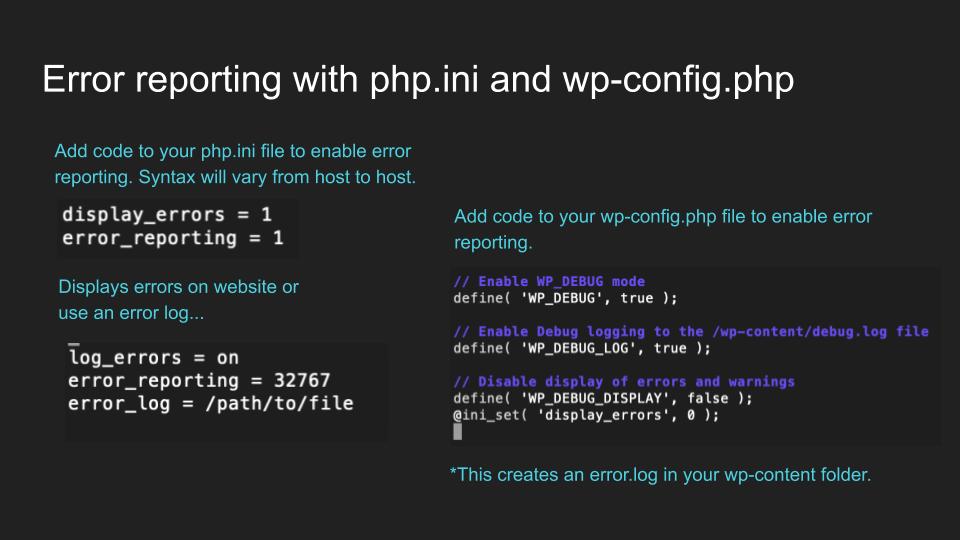
PHP Error Reporting
You can also add error reporting options to your php.ini and wp-config files. This should only be used temporarily while troubleshooting and not on an ongoing basis, as the logs tend to become very full very quickly and create extra demands on the site and server. Point being, turn it off when you are done.
In php.ini, error reporting is going to look something like this:
display_errors = 1
error_reporting = 1
In wp-config the code for error reporting looks like:
// Enable WP_DEBUG mode
define( 'WP_DEBUG', true );

// Enable Debug logging to the /wp-content/debug.log file
define( 'WP_DEBUG_LOG', true );

// Disable display of errors and warnings
define( 'WP_DEBUG_DISPLAY', false );
@ini_set( 'display_errors', 0 );

// Use dev versions of core JS and CSS files (only needed if you are modifying these core files)
define( 'SCRIPT_DEBUG', true );
More information on wp-config debugging found here.
This is what that looks like in a command line client:
Either one of these will display php errors or write php errors to a log (depending on what code you use) which you can then check through for indicators.
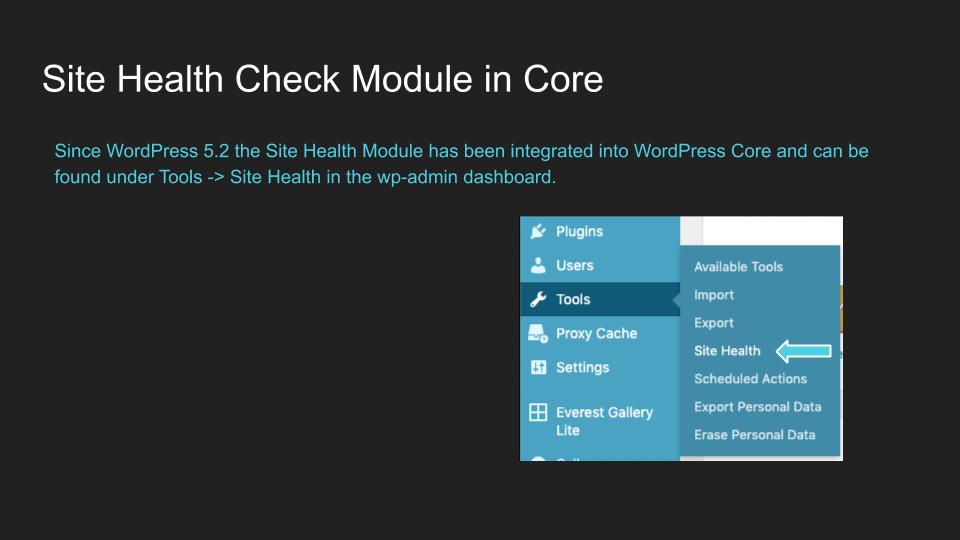
Site Health Module
The new Site Health Module provides extra fun debugging and diagnostic options in your wp-admin dashboard. You can find Site Health under Tools -> Site Health in the left hand menu of wp-admin.
This is what the Site Health page looks like in wp-admin.
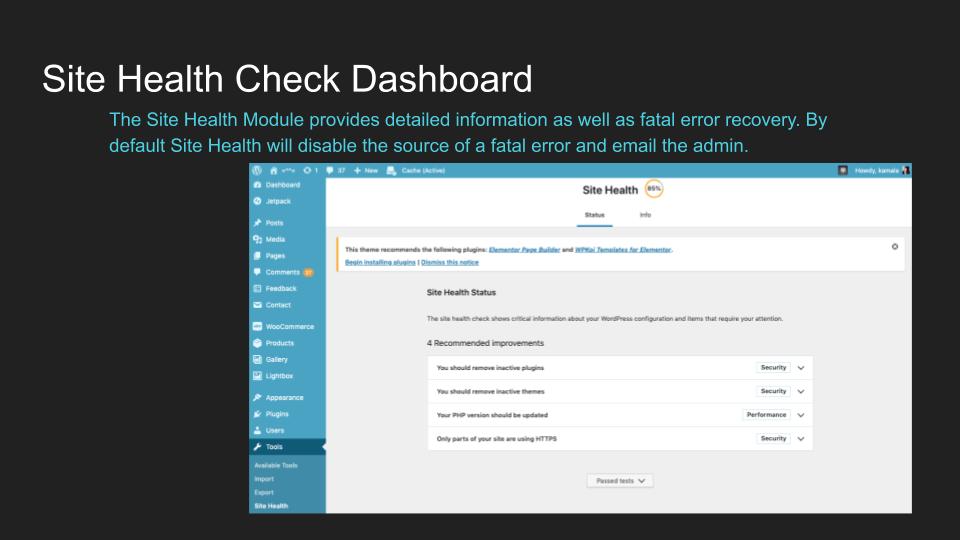
The really awesome thing is that as of WP 5.2, The Site Health module provides fatal error recovery, which means that it will disable the theme or plugin causing a fatal error and bring your site back up. This was me when this first came out:
Debugging with WP Profile
WP Profile is a set of WordPress command line commands that is great for debugging. This is another set of tools integrated into core that is just incredible.
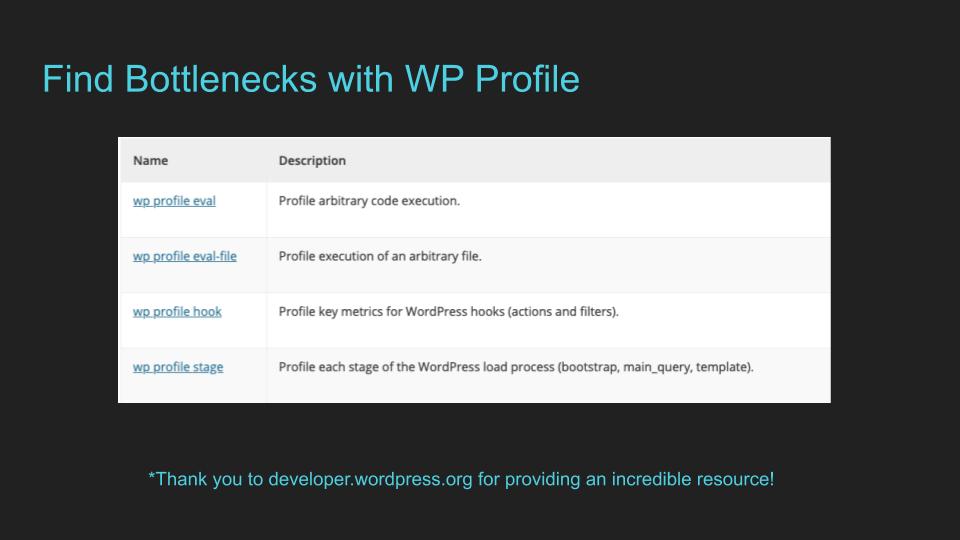
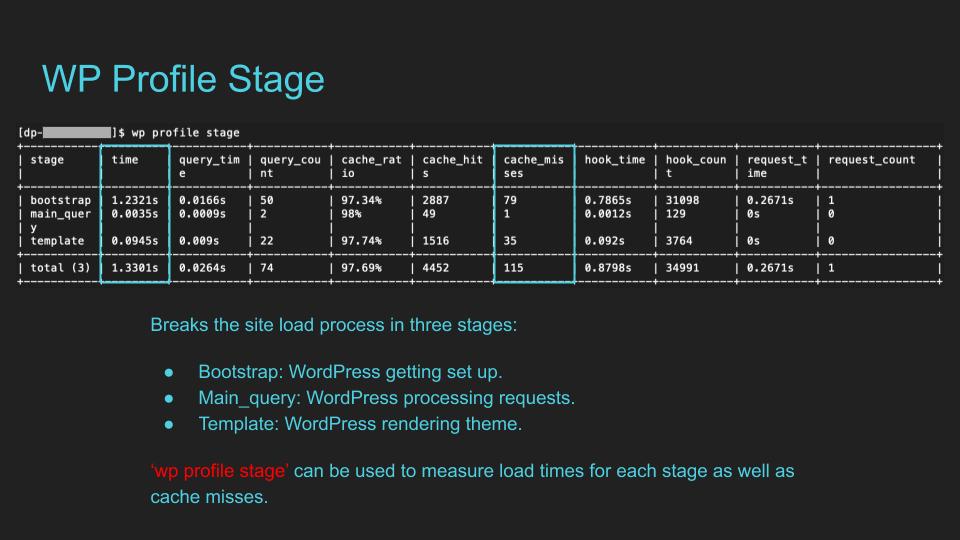
You can use a wp profile stage
- Bootstrap: WordPress getting set up.
- Main_query: WordPress processing requests.
- Template: WordPress rendering theme.
Here you can see that bootstrap is the slowest to load.
Next, break it down further into individual hooks and actions with wp profile stage <stage>

You may be wondering: Ok, I can find errors now but how am I supposed to know what they mean?
Fear not, because this article isn’t done yet and we’re about to talk about that right meow.
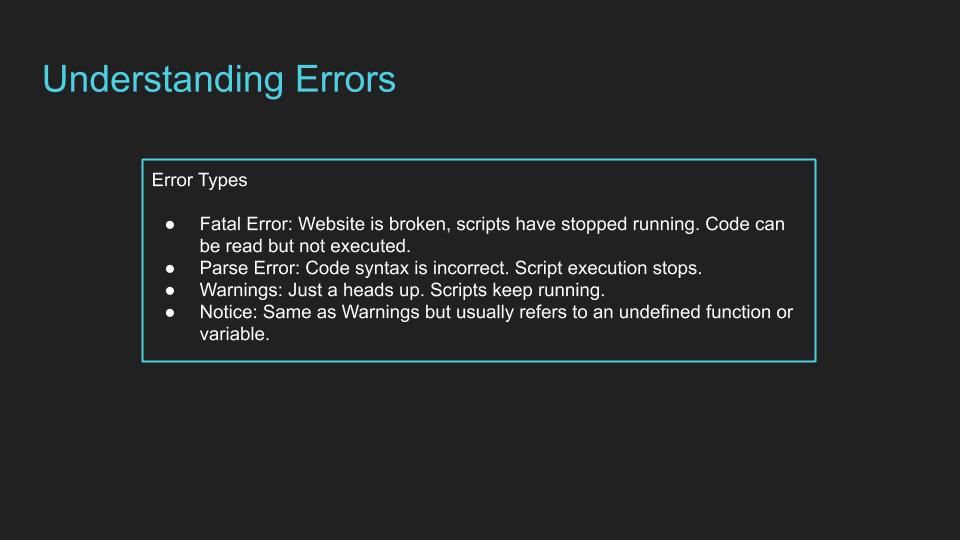
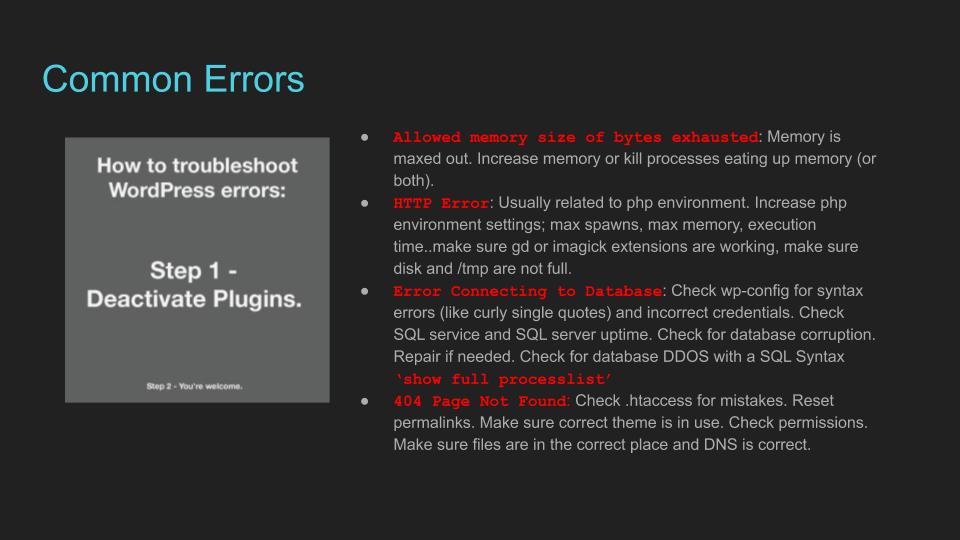
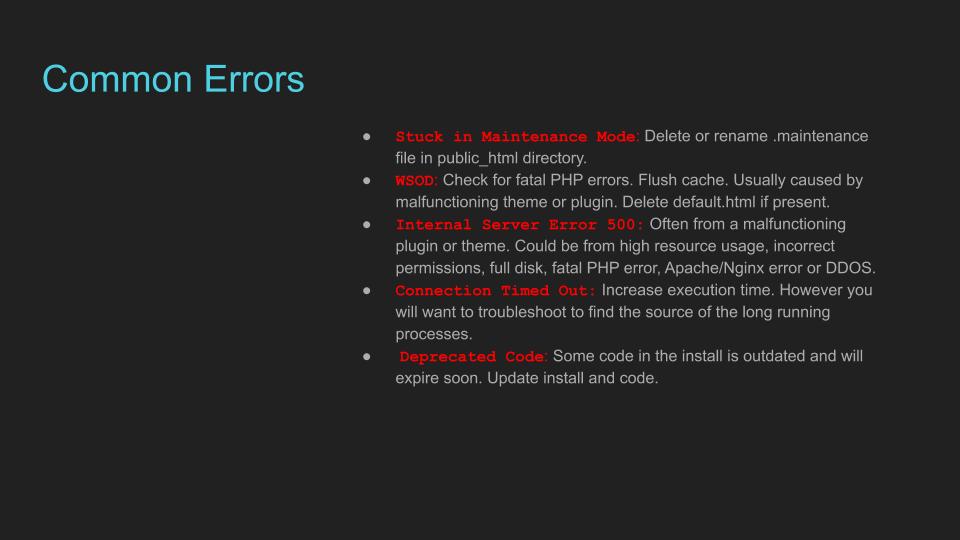
Understanding Errors
PHP has these four main types of errors. Fatal errors and Syntax errors will full on break your site, while a warning and a notice are both just a heads up.
You may be wondering: Ok, but there are a billion different errors that fall under these error types. Where do I even start?
Fear not, again. I made you a Common WordPress Error Cheat Sheet.
WordPress Error Cheat Sheet
Full disclaimer, though, I wrote this off the top of my head. Remember those 45,000+ website errors I have fixed? After a while it becomes muscle memory. The brain being the muscle in question. That being said I _did_ write this off the top of my head so please pardon any typos or other wonkiness.
You folks have all done super well getting this far, and I’m really proud of you. Now we’re going to dive into database maintenance and SQL Syntax.
Database maintenance and SQL Syntax.
A lot of people feel lost when it comes to database maintenance. Not surprisingly – it’s fairly complicated. Hopefully we can get some of those people on the right track now, though.
The database a vital part of your website and can easily become overfull with unused data, especially if you’re trying out a lot of plugins and themes. Plugins and themes often write rows and tables to the database that do not get removed when they’re uninstalled. A lot of that can wreck your site performance. So, we’ll go over how to clear out all that data that you don’t need.
WP Cli for your Database
You can use WordPress command line to work with your database.
Start by checking the size of your database with a wp db size --size_format=mb

Before you work on a database (or website, for that matter) be sure to take a backup! You can export a backup of your database with a wp db export
Check for corruption with wp db check
Repair corruption with wp db repair
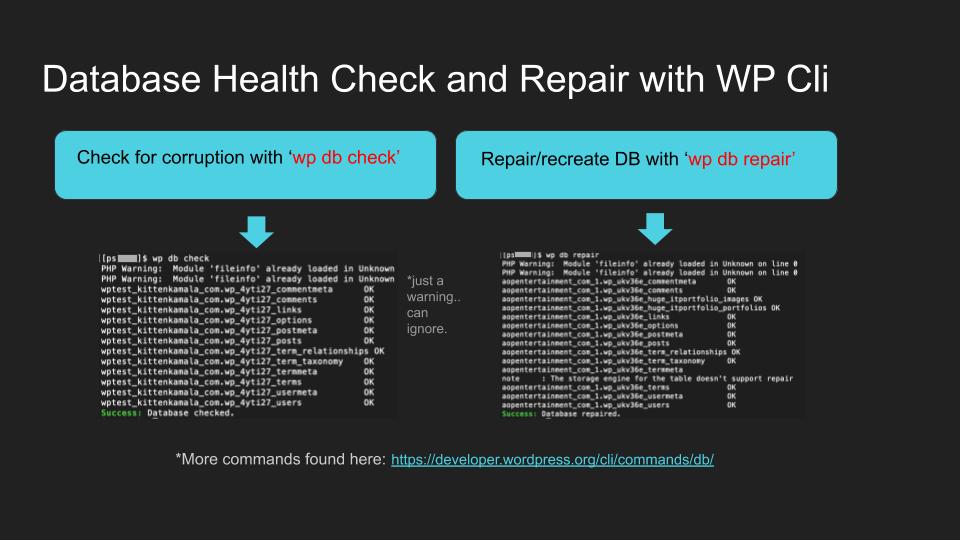
More info about wp db
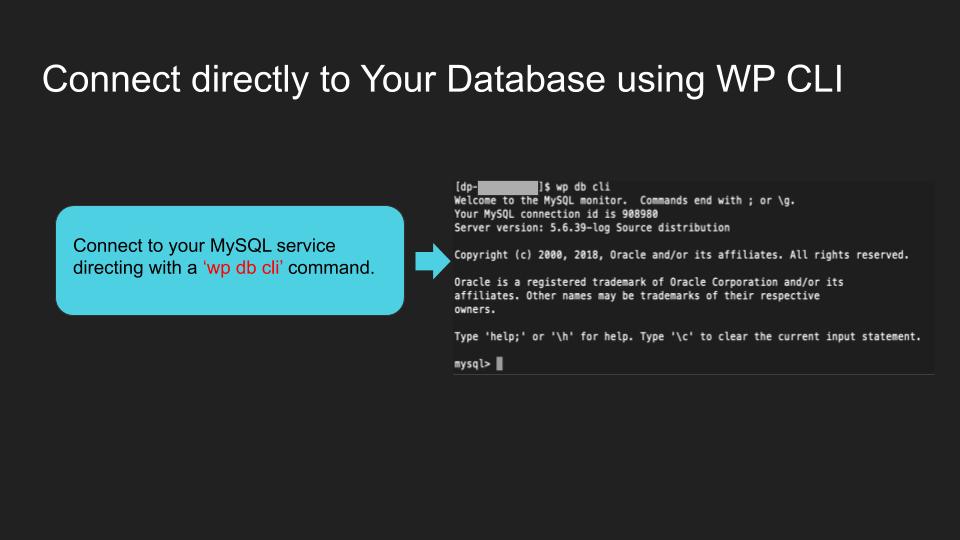
Connect to SQL with WP Cli
Connect directly to your SQL service with wp db cli . This allows you to work with SQL Syntax to query and clean up the database. There are other ways to connect to SQL with command line but this is by far the easiest one.
Now that we’re in an SQL prompt we can use regular ol’ SQL Syntax, which is not WordPress Specific and IS a language that all Engineers and Admins use.
Basic SQL Syntax
SQL Syntax is the language that MySQL and Maria DB databases speak. You can speak it, too, and talk to your database! SQL Syntax uses statements like SELECTDELETEUPDATE
Once you’re in the SQL prompt, enter in the command SHOW TABLES;
This will list all of your database tables by name. Woot! WordPress core uses 12 tables by default. The more you add to your site, the more tables are created by themes and plugins.
To see table details, use a DESC <tablename>;
desc is short for “descending”… as in: descending order.
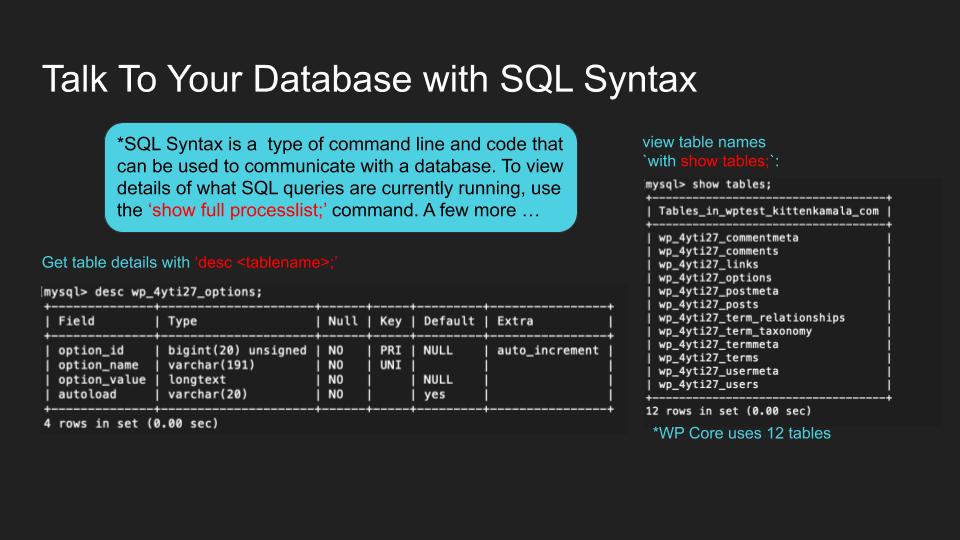
You can see what queries are running at any given moment with a show full processlist;
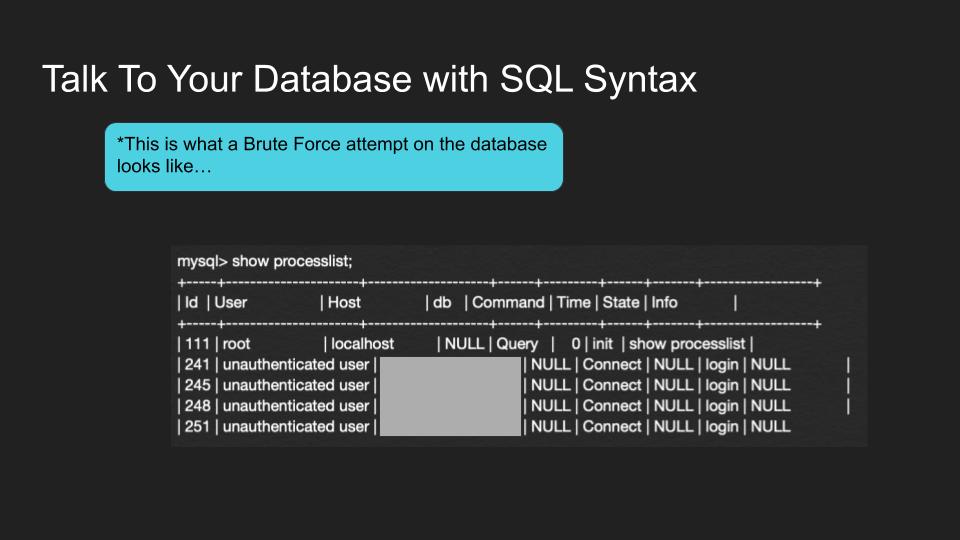
Of course at that point you would want to block the offender’s IP in IPtables or in your firewall/network. The IP is covered with the grey block here, apparently out of consideration for this hacker’s privacy on my end.
¯\_(ツ)_/¯
Next. Use InnoDB.
While you’re connected to the database, check if you’re using a MyISAM or an InnoDB storage engine.
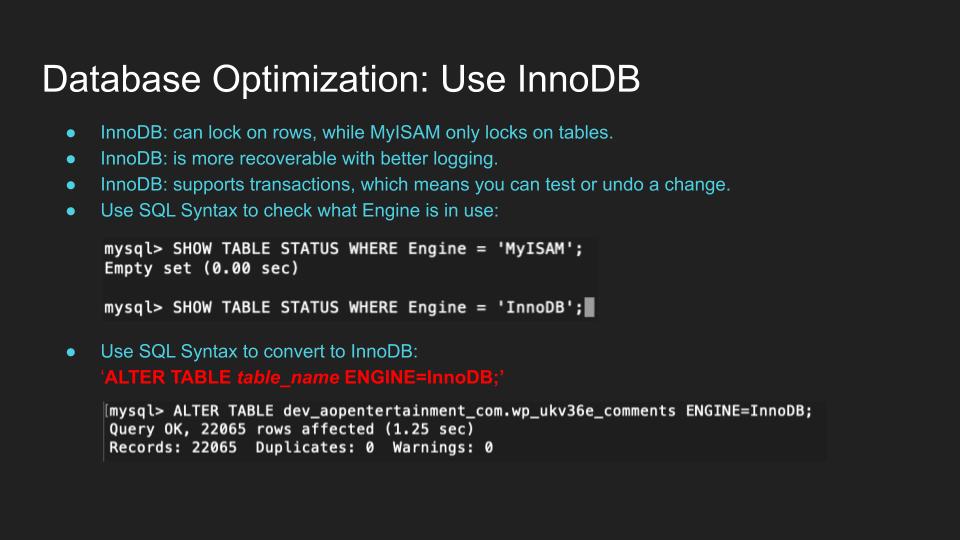
InnoDB is more performant because it can lock on individual rows whereas MyISAM only locks on whole tables. If you have larger tables you definitely don’t want to have to lock on the entire thing to retrieve data when you could just lock on part and place less demand on your system.
Again, make sure to work on a staging site, dev environment, or at the very least take a back up before making changes to the database.
InnoDB also allows for use of transactions which is sort of like version control for SQL. I don’t know about you but I’m not complaining about the option to roll back changes, at all.
You can convert tables to InnoDB using SQL Syntax.
First check what tables are using what storage engine. It is possible to have a mix of both in a database.
SHOW TABLE STATUS WHERE ENGINE = InnoDB;
SHOW TABLE STATUS WHERE ENGINE = MyISAM;
You can change any MyISAM tables to InnoDB with an ALTER
ALTER TABLE table_name ENGINE=InnoDB;
Just a quick note, this can take a little while if the database and tables are larger and/or if there are a lot of them. Plan for 2-5 minutes per table. Set some time aside.
Database Indexing
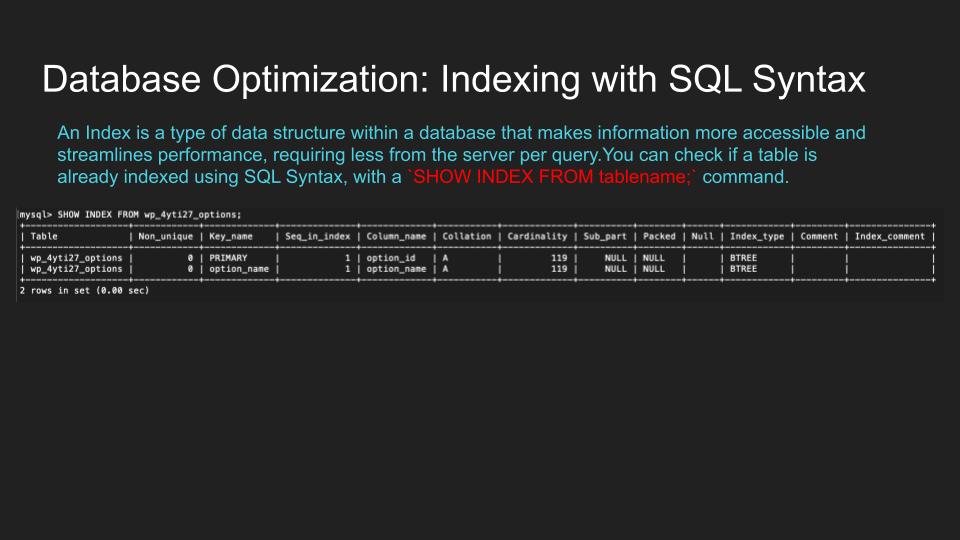
An Index is a type of organizational system within a database that makes information more easily accessible, thus streamlining performance and requiring less from the server.
Having well indexed tables is imperative because that makes data easier and faster to retrieve. WordPress core is well indexed in a fresh install, but if you add a lot of content and plugins you’ll want to check and make sure that indexing is still solid. Fix it if not.
You can check for indexes that already exist in the database with SHOW INDEX FROM tablename;
Of course inputting your actual table name.
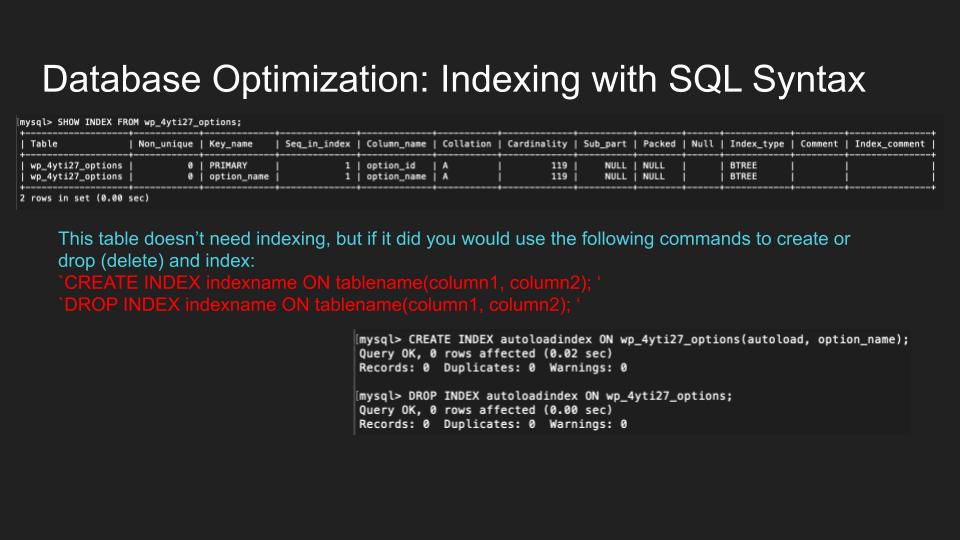
You can create and drop (delete) index’s with CREATEDROP
CREATE INDEX indexname ON tablename(column1, column2);
DROP INDEX indexname ON tablename(column1, column2);
Example:
CREATE INDEX autoloadindex ON kittenkamala_com_4.wp_gmrig8_options(autoload, option_name);
kittenkamala_com_4wp_gmrig8_options
Okay, now let’s start looking at individual tables.
Exit out of SQL with an exit command. Easy peasy.
Side note: You may have figured out that database table names start with something called a ‘prefix’. By default the prefix for WordPress is ‘wp_’, however sometimes the prefix is different. So .. it is that way unless it’s not that way. ^__^ .. these are confusing times. Just snag the prefix from your wp-config.php file or from command line output (like show tables;).
The _options table
The _options table is a vital table that is used on every inch of the site. A lot of themes and plugins write to the options table which can tend to make it very large and slow your site down significantly.
Ideally, the _options table should be less than 5 MB. Actually, less than 3 MB is ideal but 5 is the max.
You can delete transients and session rows and update leftover crons, using SQL syntax and WordPress command line.
Transients are similar to cache in that they are used for storing data temporarily for a faster delivery. Often used by plugins and themes. Only .. they are stored in the _options table and they don’t always get deleted. Ick! You can delete expired transients yourself, though, really easily, with the wp transient WP Cli command.
wp transient delete --expired
--expired--wp transient delete
Then go back into SQL with a wp db cli
We’re going to delete sessions rows using SELECTDELETESELECT
SELECT * FROM database.prefix_options WHERE option_name LIKE '_wp_session_%';
Then go ahead and delete them. if there are a lot you may want to cap the amount that are deleted at once with a LIMIT
DELETE FROM database.prefix_options WHERE option_name LIKE '_wp_session_%' limit 10;
This will delete 10 at a time.
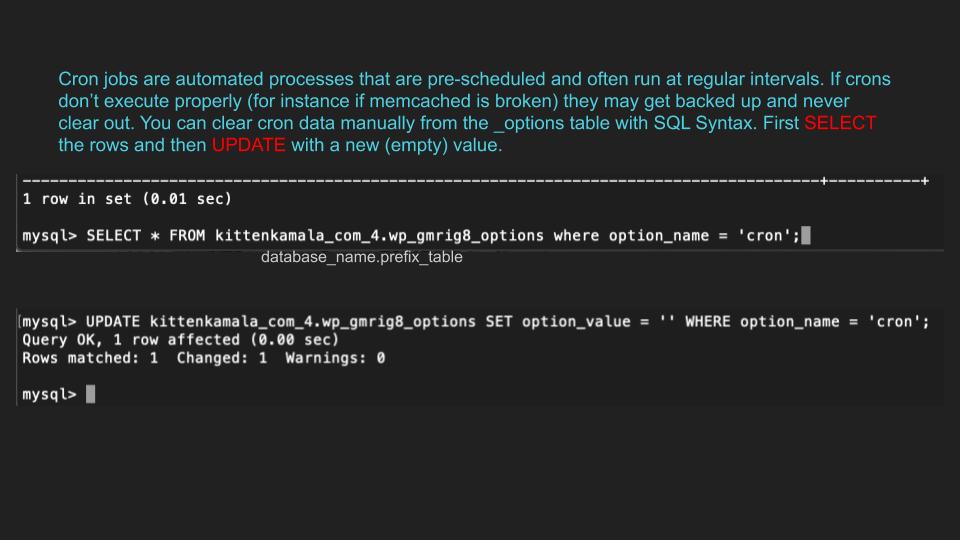
Next we’re going to update cron rows from the database to be blank (so they stop trying to run).
Firstly, if crons are piling up, push some of them through using WP Cli:
wp cron event run --due-now
If they don’t push through, update them to be blank. When your _options table has a ton of crons that didn’t execute you may need to check to make sure your persistent object cache is working. Ask your host to check.
For updating leftover crons we’ll use an UPDATE
UPDATE database.prefix_options SET option_value = '' WHERE option_name = 'cron';
Autoloaded Data
Still working on the _options table. Plugins and themes often write data automatically to the _options table which can seriously pile up fast. Run this SELECT
SELECT option_name, length(option_value) AS option_value_length FROM database.prefix_options WHERE autoload='yes' ORDER BY option_value_length DESC LIMIT 10;
Check out how much autoloaded data is in kittenkamala.com! Wowee!!

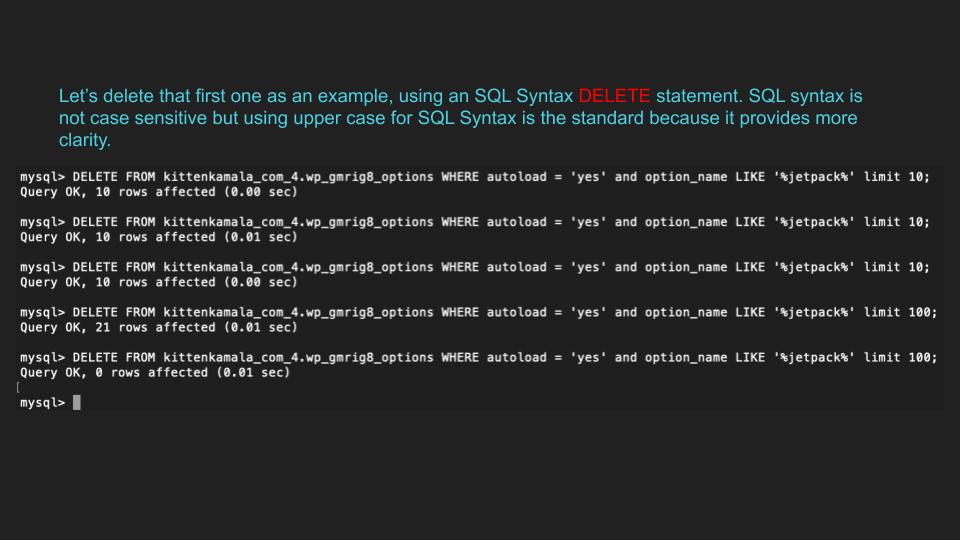
Delete autoloaded data using a DELETE
DELETE FROM database.prefix_options WHERE autoload = 'yes' and option_name LIKE '%jetpack%' limit 10;
I increased the limit to speed things along after testing it out.
For a squeaky clean _options table you can delete all your autoloaded data. Kinsta has an amazing article on it (#ad). Shout out to Kinsta (#ad) for real, because their Knowledge Base is amazing. *bow*
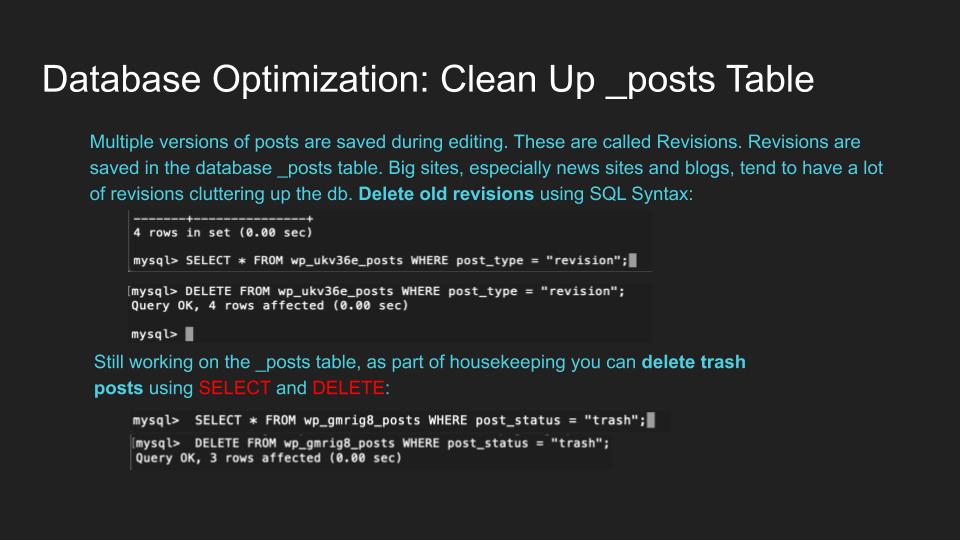
_posts table.
As you edit your posts in wp-admin, WordPress is working overtime for you, saving copies of your post content. These are called revisions. Once you have a final product, you really don’t need them anymore. Revisions can be deleted easily using SQL Syntax.
DELETE FROM prefix_posts WHERE post_type = "revision";
You can also delete trash posts with a similar statement. Those are posts that you already deleted in wp-admin. Only, surprise! They didn’t actually get deleted and they stay lurking in your _posts table until you delete them manually.
DELETE FROM prefix_posts WHERE post_status = "trash";
You can add customizations to your wp-config.php file to prevent revisions from piling up. This limits the amount of revisions saved per post to 3.
define( 'WP_POST_REVISIONS', 3 );Cap the frequency of revision autosaves in wp-config.php as well, to help keep revisions minimal:
define( 'AUTOSAVE_INTERVAL', 600 );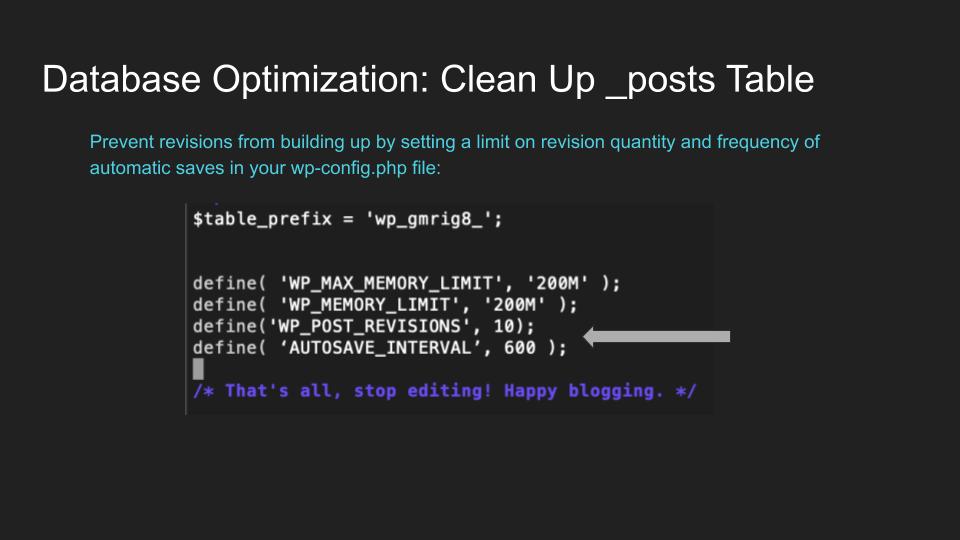
Ok, I know this is a lot so far. We’re getting really close to the finish line. Let’s keep going.
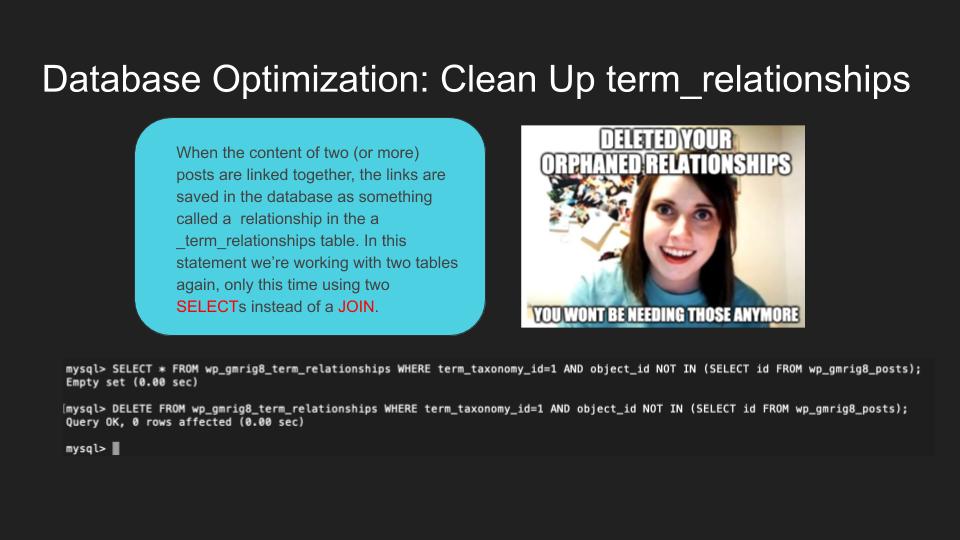
_term_relationships
Next, we’ll clear out orphaned relationships. When two posts are linked to one another it is saved in the term_relationships table as a “relationship”. There are one to one relationships, one post to one post, and one to many relationships. Sounds like humans, right? (>.>)
This delete statement is using two SELECT
DELETE FROM prefix_term_relationships WHERE _term_taxonomy_id=1 AND object_id NOT IN (SELECT id FROM prefix_posts);
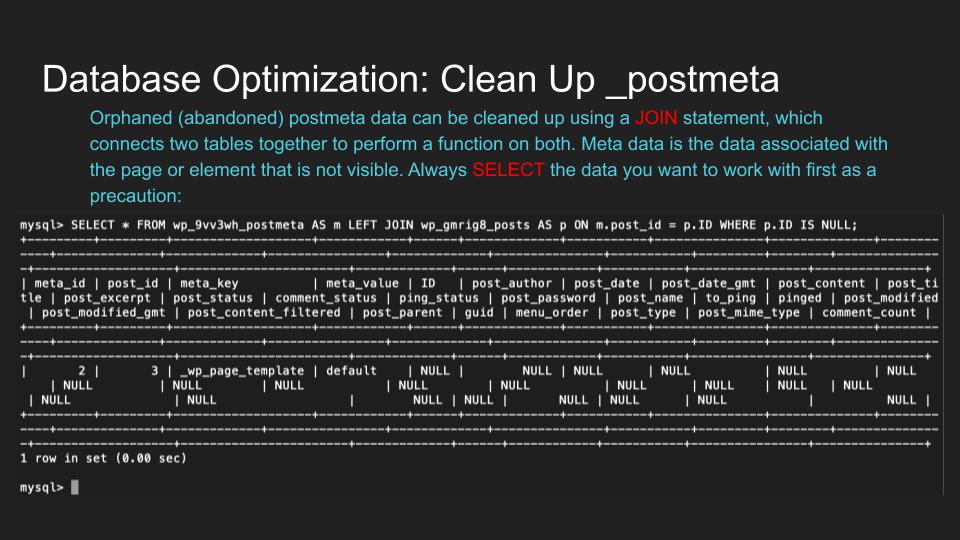
_postmeta table
Meta data is all the information on a web page that is not visible to the eye. For posts, this is stored in the _postmeta table.
You can delete leftover postmeta data with SQL Syntax:
Here we’re using a JOIN
DELETE FROM prefix_postmeta AS m LEFT JOIN prefix_posts AS p ON m.post_id = p.ID WHERE p.ID IS NULL;
In this statement mp
Null is a value of nothing, not to be confused with no value at all. Value of nothing vs. no value at all. A balloon can be full of water, full of sand, full of air, or not be full at all. Null would be the full of air version. No value would mean the balloon is empty – not full of anything. Or perhaps the balloon doesn’t even exist. With null, the balloon exists and is full with a value. The value also exists and means “nothing to see here”. But let’s get back to SQL syntax before we fall into a philosophical rabbit hole.

_comments table
Delete spam, trash and pingbacks from your _comments table.
A pingback is a notification that another site has linked to this page. You really don’t need them. Get rid of ’em if your _comments table is large.
DELETE FROM prefix_comments WHERE comment_approved = 'spam' limit 10;
DELETE FROM prefix_comments WHERE comment_approved = 'trash' limit 10;
DELETE FROM prefix_comments WHERE comment_type = 'pingback' limit 10;

Delete unapproved comments from the _comments table.
DELETE FROM prefix_comments WHERE comment_approved = '0' limit 10;
In this case 0 represents a boolean value (true or false) and not a numeric one.
If you’re using a limit, you may need to run the command a few times.
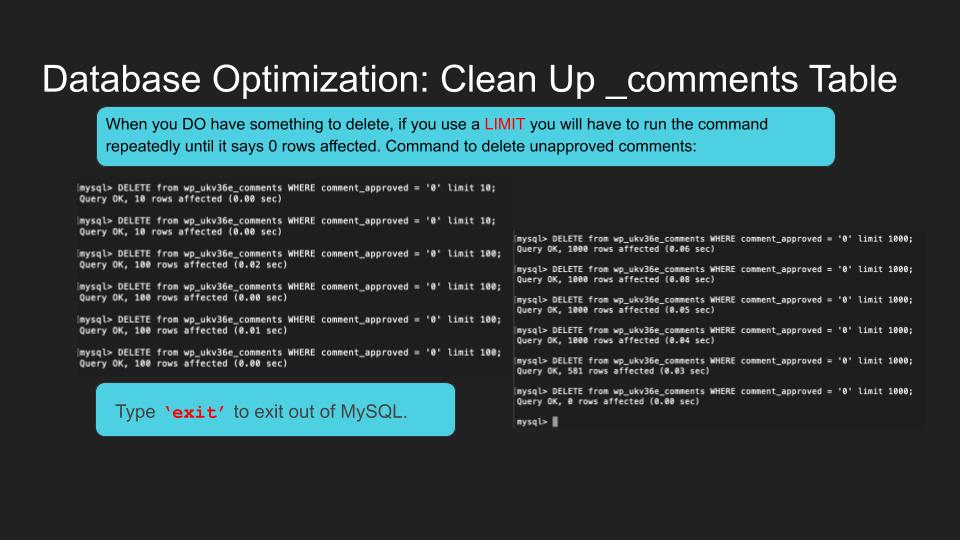
You can go ahead and exit out of SQL with an exit
You absolutely killed it at this database clean up thing just now.

We’re almost done here.
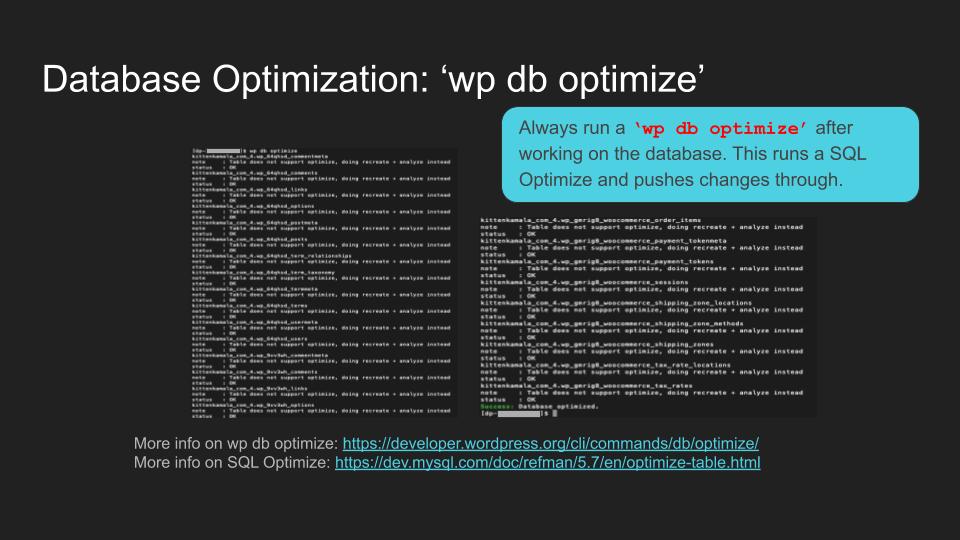
Push changes through with wp db optimize
Always always always run a wp db optimize
Clear Persistent Object Cache
Last but not least, finish up by clearing the database cache with a wp cache flush
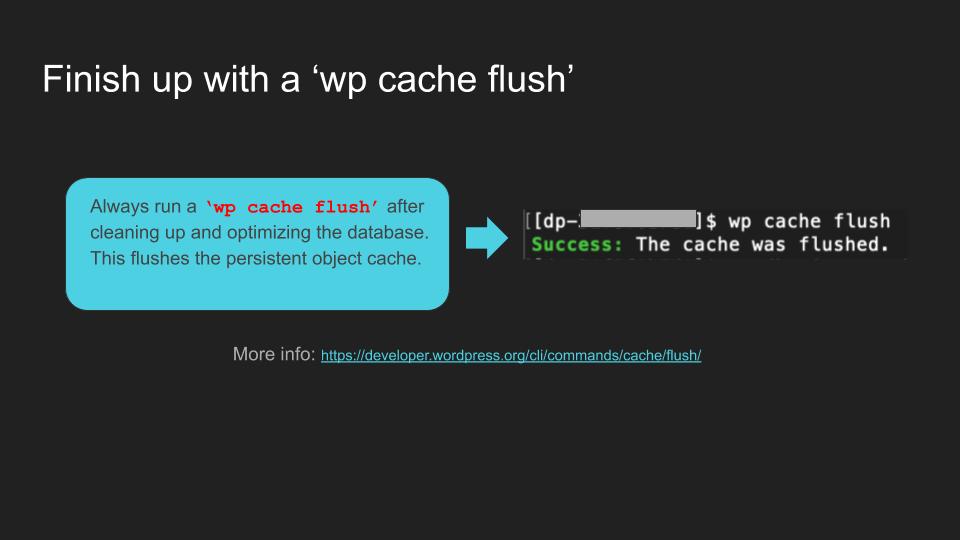
You should be good to go now.

Congratulations! You just did your first professional WordPress optimization.
Questions or comments? Drop them below. I’ll try not to delete ’em 😛
Comments are closed.